The Restoration Gap: Why “Mitigation Only” Costs Minnesota Homeowners Thousands

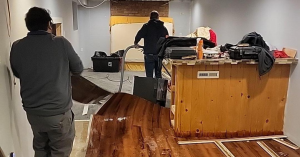
Setting up industrial air movers and dehumidifiers for water damaged kitchen

A restoration gap is the window of time between when a pipe, sump pump, or dishwasher or ice-maker line fails and when cleanup actually begins. In most Twin Cities water damage events that gap stretches to two or three weeks — and the reason is structural. Mitigation companies can dry a house, but they can’t fix the pipe, pump, or line that caused the flood. A separate plumber has to come, diagnose, source parts, and complete the repair before drying equipment can be set. During that wait, mold grows, drywall wicks water upward, and insurance claims get complicated.

At Bedrock Restoration in St. Louis Park, MN, we close that gap. We are a licensed Minnesota general contractor with a Master Plumber on staff — meaning our team that arrives to extract the water will also shut off the leak, repair the source of the issue, and start the dry-down. One visit. One contract. One timeline.

What is the restoration gap and why does it exist?

The U.S. restoration industry grew up as a clean-up industry. Most national franchises — the household names on the yellow trucks — hold no plumbing license and no general contractor’s license. Their scope is narrow: extract water, set air movers, charge the insurance company.

That model can work temporarily on simpler leaks, when a dishwasher hose or toilet supply line can be shut off at the supply. But even then a plumber will need to be called in eventually. And that model falls apart completely when the source of the flood is still leaking — a hairline copper pinhole above a kitchen ceiling, a cracked PEX fitting behind a wall, a failed sump pump or water heater in a finished basement. In those cases mitigation technicians cannot legally repair the pipe. They tape off the area, tell the homeowner to call a plumber, and often leave the property until the plumbing work is done.

In St. Louis Park, Minnetonka, and Edina — markets with older housing stock and a high density of finished basements — that “wait for the plumber” phase runs 8 to 21 days once you account for emergency service backlogs, part availability, and the homeowner taking time off work to let two separate trades into the house.

The 48-hour mold clock doesn’t care about your calendar

The Institute of Inspection, Cleaning and Restoration Certification (IICRC) treats 48 hours as the standard threshold for microbial amplification in a wet building assembly. After that window, mold isn’t a risk — it’s a condition. Drywall becomes a Category 3 material. Baseboards and cabinet toe-kicks become disposable. Wet insulation has to be bagged out rather than dried.

The 48-hour mold clock starts the moment the water lands. It does not pause while you wait for a plumber.

A homeowner who loses a water heater on a Friday night, calls their insurance on Saturday morning, gets a mitigation referral on Monday, and schedules a plumber for Wednesday has already burned four days. At that point, the mitigation team that finally arrives isn’t drying a wet house — they’re demolishing a contaminated one. We see this pattern every week in the West Metro and Minneapolis: a repairable flood turns into a reconstruction job because the wrong team arrived first.

What the gap actually costs you

Three things get more expensive the longer the gap runs:

  1. Scope creep. Materials that could have been dried have to be replaced instead. A $6,000 mitigation claim becomes a $25,000 mitigation-plus-rebuild claim.
  2. Insurance complications. Adjusters look for “ongoing or repeated seepage” — a phrase used to deny claims. Every day water sits, the file looks more like a maintenance issue and less like a sudden event.
  3. A second deductible exposure. Some policies treat mold as a separate covered peril with its own sublimit, often $5,000 or $10,000. Homeowners who let mold bloom during the gap can exhaust that sublimit before demolition even starts.

Why most restoration companies can’t close the gap

There are real reasons the industry built itself this way, and they’re worth understanding so you can tell the difference between a full-service contractor and a rebrand.

Licensing. In Minnesota, repairing plumbing for hire requires a licensed plumbing contractor with a Master Plumber of record. Performing residential reconstruction work over $15,000 requires a residential building contractor license from the Minnesota Department of Labor and Industry. Each license carries its own continuing education, bonding, and insurance requirements. Most franchise restoration operators hold neither — they hold only mitigation-focused IICRC certifications.

Insurance and bonding costs. Carrying both GC and plumbing licenses roughly doubles a small company’s annual insurance and bonding expenses. The franchise model is optimized for volume and throughput; adding licensed trades cuts into that margin.

Workforce. Master Plumbers in the Twin Cities are among the hardest-to-hire trades in Minnesota. Hiring one full-time only makes sense if you have enough plumbing work to keep them busy between floods.

So the industry’s honest answer is: “We could do single-source — but it’s not what our model is built for.” Ours was built for it.

How the single-source model actually works on a job

When a Bedrock truck rolls into a flood in Edina, Minnetonka, Eden Prairie or Chanhassen, the same crew handles every step a two-trade sequence would handle — just without the handoff.

Hour 0–1: Stabilize and diagnose. Our plumber shuts off the source, isolates the failed component, and documents the cause of loss with photos that hold up in a claim. This step alone often saves homeowners a denial, because insurance carriers require proof that the failure was “sudden and accidental,” not gradual.

Hour 1–3: Repair the leak. Same crew, same visit. The pipe gets fixed before a single air mover is deployed. In most cases we restore domestic water service the same day — which matters when you have a family to feed and no running water.

Hour 3–8: Extraction and drying setup. IICRC-certified technicians extract standing water, remove contaminated materials under Category 2 and 3 protocols, and stage LGR (low-grain refrigerant) dehumidifiers and directed air movers. Every affected wall gets scanned with a moisture meter and a thermal imager, and the readings go into a daily moisture map the adjuster receives with the claim file.

Days 2–4: Monitored dry-down. Standard timeline for a single-room flood. Longer if the water traveled through floor assemblies or wall cavities.

Day 5 and beyond: Reconstruction. If materials have to be replaced, the same company that dried the house rebuilds it. No second bid, no starting over with the insurance adjuster. Our carpenters, drywall crew, and trades pick up where the mitigation crew left off.

The reconstruction advantage most mitigation companies leave on the table

Because our general contractor license lets us perform the rebuild, we quote both phases against the same Xactimate scope the adjuster is working from. That has two practical effects for homeowners.

First, there’s no “hand-off tax.” When two companies split a job, the reconstruction bidder has to re-measure, re-photograph, and re-estimate work the mitigation team already documented. Homeowners end up paying for that overlap — either directly or through a depleted claim.

Second, the rebuild often becomes an upgrade opportunity. If the walls are already open, the cost of adding a recessed light, relocating an outlet, or upgrading a cabinet run is a fraction of what it would cost as a standalone project. We walk every Bedrock client through what insurance will cover as “like kind and quality” and what they can add out of pocket at trade pricing. That conversation consistently saves our clients in St. Louis Park and the West Metro roughly 20–30% on post-flood improvements compared to starting a separate remodel a year later.

We cover that tradeoff in more depth in our guide on turning a water damage claim into an insurance-funded remodel.

What to ask any restoration company before you sign

If you want to avoid the restoration gap without hiring Bedrock, ask these four questions of any company on your adjuster’s preferred-vendor list:

  1. Do you hold a Minnesota residential building contractor license, and can you give me the license number?
  2. Is there a Master Plumber on your staff, or do you subcontract plumbing repair?
  3. If I hire you for mitigation, do you also rebuild?
  4. Who pays for the time between mitigation and reconstruction if it extends the mold window?

Any company worth hiring will answer those without hesitation. If the answer involves the phrase “we have trusted partners,” you are being sold a two-trade job.

Frequently asked questions

Does every water damage job need single-source service? No. If the source is already stopped — a one-time overflow from a tub, a washing machine supply hose that was caught and shut off — a mitigation-only company can handle the job. Single-source matters most when the leak is still active, hidden, or caused by a failed fixture that needs replacement before drying can begin.

Is a single-source restoration company more expensive? No. On the line-item invoice, the Xactimate pricing guide the carrier uses sets the ceiling. The savings show up in scope: less demolition, faster dry-down, and no overlapping charges between trades.

Does insurance cover the plumbing repair itself? Most homeowners policies in Minnesota cover the resulting damage from a sudden plumbing failure but exclude the failed component itself. The $200 pipe repair is on you; the $20,000 water damage is covered. Strong cause-of-loss documentation helps clients argue for the broadest possible interpretation of that line.

What service areas does Bedrock cover? Edina, Minnetonka, Chanhassen, Eden Prairie, St. Louis Park, Plymouth, Bloomington, Golden Valley, Hopkins, Minneapolis, and the rest of the West Metro area. We run 24/7 emergency dispatch with a Master Plumber on call. For local water damage response, see our St. Louis Park water damage restoration service page.

Call Bedrock at 612-834-1501 for a Truth-First Assessment.

The First 48 Hours After a Fire: A Homeowner’s Checklist

Fire damaged house with notepad for assessment

Nothing prepares you for what the first day after a house fire feels like. You’re standing in a hotel parking lot or a relative’s kitchen, you’ve slept maybe two hours, and your phone is filling up with calls from your insurance company, the fire marshal, and people you didn’t know existed yesterday. Everyone wants something from you. You can’t think straight enough to remember your own address.

This is the post we wish every Twin Cities homeowner had bookmarked before they needed it.

We’ve walked hundreds of families through this. The first 48 hours have a rhythm to them, and once you know what’s coming, the panic drops a notch. Below is exactly what to handle, in the order we’d handle it ourselves, organized so you can work through it without missing the things that matter most.

A note before you start. The single biggest decision in this window is which fire restoration company you hire, because that one choice determines whether you have an advocate on your side of the table for the next six to twelve months. We wrote a separate piece on that here: Should You Use the Fire Restoration Company Your Insurance Adjuster Recommends? Read it before you sign anything.

Now, the rest of the list.

Housing and Finances

The first practical question is where you’re sleeping tonight, tomorrow, and the next several months.

Set up Additional Living Expenses (ALE) with your insurer. Almost every homeowner’s policy includes ALE coverage. It pays for hotels, rentals, meals beyond your normal grocery spend, pet boarding, and anything else you’re paying for because you can’t live in your home. You have to formally activate it. Call your insurance company and say the words “I’d like to open my Additional Living Expenses coverage.” Ask what the daily or monthly cap is and how long it lasts.

Book temporary rental housing. Hotels are fine for a night or two, but a fire rebuild is a long road. Most jobs run four to nine months from loss to move-back. A furnished rental gives your family a kitchen, separate bedrooms, and a place to actually live. Look on Furnished Finder, Airbnb monthly stays, or call a local property manager who handles corporate relocations.

Keep every receipt. All of them. Meals, gas to and from the property, replacement clothing, toiletries, a phone charger because yours is in the house, the deposit on the rental, pet boarding, dry cleaning, everything. Most of it is reimbursable under ALE, but only if you have proof. Start a folder in your email and one on your phone for photos of paper receipts.

Write down your claim information. Claim number, adjuster’s full name, adjuster’s phone, adjuster’s email, deductible amount. Put it all in one note on your phone. You’ll be asked for these by every party involved, sometimes daily, for months.

Notify your mortgage company. They have a financial stake in your home and they need to know there’s been a loss. Insurance proceeds for the rebuild are usually issued in your name and the mortgage company’s name jointly. Calling them now prevents a paperwork mess later.

Contact your auto insurer if vehicles were involved. Auto and home are different policies and different claims. Don’t assume one adjuster handles both.

Communications and Service Changes

Your house is empty now, but the world doesn’t know that yet. Mail still arrives. Packages still get delivered. Subscriptions still bill.

Forward your mail. Go to USPS.com and set up a temporary mail forward to your rental address. It takes ten minutes.

Pause or cancel internet, cable, and any home utilities you can. No reason to pay for service at a damaged house. Most providers will pause your account for a month or two without penalty if you tell them what happened.

Update your address with delivery services. Amazon, UPS, FedEx, any subscription boxes. Otherwise packages pile up at the property and disappear.

Photograph the contents of your refrigerator and freezer before throwing food out. Most policies cover food spoilage as part of the contents claim. Open the doors, take a wide photo and a few close-ups, and keep a rough list of what was in there. Then throw it all out, the smell after a few days will be something you can never unsmell.

Notify your kids’ schools. Give them the temporary address and a note about pickup or drop-off if anything is changing. Teachers should know what’s going on, kids who’ve been through a house fire often need extra patience for a few weeks.

Tell your employer. You may need flexibility for adjuster meetings, contractor walk-throughs, contents pack-outs, and the general fog of the first month. Most employers will work with you, but only if they know.

Personal and Safety Items

The day after a fire, the fire department or your restoration crew will let you back into the house for a controlled walk-through. Do not try to enter alone, structural integrity, air quality, and electrical safety are real concerns.

When you do go in, here’s what to grab:

Prescription medications. All of them, for everyone in the household. If they’re in the kitchen or bathroom and the bottles are intact, take them. If they’re contaminated, take a photo of the label and call your pharmacy.

Eyeglasses, contacts, and medical devices. CPAP machines, hearing aids, blood pressure monitors, glucose monitors, mobility equipment. If you can’t find something or it’s damaged, call the manufacturer or your doctor for a replacement. Insurance contents claims usually cover this.

Call your pharmacy. Ask them to flag your account so refills aren’t interrupted, and update them with a new pickup location if you’ve moved across town.

Firearms. Locate every firearm in the house and store them off-site somewhere safe. A fire-damaged home with broken windows and a board-up is not secure. A relative’s gun safe, a friend’s house, or a paid storage solution all work.

Critical documents. Passports, birth certificates, social security cards, marriage license, deed to the house, vehicle titles, life insurance policies, wills. If your fireproof safe is intact and accessible, get it open. If it’s not safe to retrieve, it can wait, and most documents can be replaced.

One sentimental item per family member if it’s safe to grab it. A photo album. A wedding ring. A kid’s stuffed animal. After 48 hours of crisis logistics, having one familiar thing helps more than people realize.

Track Your Contacts in One Place

Over the next several months you will be asked for the same five pieces of information by every party involved. Adjusters, contractors, mortgage company, fire investigators, public adjusters, attorneys if it goes that direction. Save yourself the search.

Keep a single note or document with:
  • Fire report or incident number
  • Fire investigator’s name and phone number
  • Insurance adjuster’s name, phone, and email
  • Insurance claim number
  • Your restoration company’s project manager and direct line

We hand every Bedrock customer a printed version of this exact log on day one for this reason. Lost paperwork is one of the top causes of delays on fire claims, and the homeowner is usually the one paying for the delay in extra rental months.

What Comes Next

Once the first 48 hours are behind you, the pace changes. The fire investigation has to wrap, usually a few days to a few weeks. Your restoration company will move through bulk debris removal, then full demo, then mitigation, all gated by formal releases from the fire department, the police, and your insurance carrier. After mitigation comes the rebuild scope negotiation, then the rebuild itself.

A good restoration partner walks you through every release and every milestone, in plain language, so you always know what’s happening and what’s next.

You don’t have to figure this out alone.

If you’ve had a fire in the Twin Cities and you’re standing in the parking lot trying to figure out what to do next, call us. We answer 24/7, we’ll tell you what to handle in the next hour and what can wait until tomorrow, and we’ll be on-site within the hour if you need us.

The Bedrock Team 612-834-1501 service@bedrockrestoration.com

Should You Use the Fire Restoration Company Your Insurance Adjuster Recommends? Read This First.

Consultation of fire damaged house
When a fire tears through your home, you’re not thinking clearly. You’re standing in a driveway, your house is wrecked, and you want someone to take the problem off your plate. So when the insurance adjuster shows up and says, “Don’t worry, I’ll get a fire restoration company out here,” it feels like a relief.

We get it. We see this exact moment play out almost every week.

Here’s what every homeowner in the Twin Cities should understand before that moment arrives. The fire restoration company your adjuster brings out is not working for you. They’re working for the insurance company. And that distinction is going to cost you, sometimes in ways you won’t notice until months later when you’re staring at a mismatched paint line, cabinets that still smell like smoke, or a ceiling that should have been replaced instead of cleaned.

So here’s how the system actually works, plainly, so you can make the right call for your home.

What “Preferred Contractor” Actually Means

Insurance carriers run programs with names like Preferred Contractor Network, Managed Repair Program, or Direct Repair. The marketing makes it sound like a stamp of quality. It isn’t. It’s a contract.

To get on those programs, fire restoration companies agree to specific terms. The terms vary by carrier, but the pattern is consistent.

The contractor agrees to follow the adjuster’s scope of work without pushback. The contractor agrees to specific pricing, often below market rate. The contractor agrees not to dispute the adjuster’s findings on coverage or scope. In exchange, the contractor receives a steady flow of leads.

Read that again. The contractor agrees not to push back on the adjuster. That’s the deal. That’s why they’re on the list.

So when an adjuster says “I have a great company I work with,” what they’re really saying is “I have a company that will not challenge me on anything.”

That works great for the insurance company. It does not work great for you.

What This Costs You on Fire Mitigation

Fire mitigation is the emergency work in the first one to two weeks after the loss. Board-up, soot removal from structure and contents, smoke odor treatment, HVAC cleaning, demo of unsalvageable materials, contents pack-out and inventory.

A program contractor’s job is to do the minimum scope the adjuster approves. If the scope says clean the soot off the framing, they clean the framing, even when the soot has penetrated the wood and the right call is to remove and replace. If the scope says ozone the contents, they ozone, even when the right call is replacement. If the scope says clean the ductwork, they clean it, even when the system needs to come out.

An independent contractor’s job is different. We assess the loss based on what the IICRC fire and smoke restoration standard says should happen, document it with photos, soot testing, and written justification, and tell the adjuster what’s required. If we disagree with the scope, we say so on the record.

The difference shows up six months later when the smoke smell comes back every time the furnace kicks on. Or when the framing keeps off-gassing through fresh drywall. Or when your kid’s bedroom still smells like a campfire.

What This Costs You on the Rebuild

This is where the real money disappears.

Fire rebuild is the put-back work, and on a fire job it’s massive. New framing, drywall, insulation, paint, flooring, cabinets, trim, fixtures, electrical, sometimes structural. The scope is enormous and so is the room for the insurance company to save money at your expense.

Here’s a short list of what we routinely see program contractors accept on fire claims that we would fight.

Painting only the affected rooms instead of the connected open-concept space, leaving you with visible color lines where one room meets the next. Cleaning smoke-damaged cabinets instead of replacing them. Sealing sooted framing instead of removing it. Refinishing hardwood that should be torn out and replaced. Using a builder-grade material when the original was higher end. Skipping trim, baseboards, and crown molding that absorbed smoke. Not replacing insulation that holds odor for years. Patching ceilings instead of replacing full sheets, leaving texture mismatches you’ll see every time you walk into the room. Reusing HVAC equipment that should be replaced.

Every one of those is a fight an independent contractor has with adjusters all the time. We win most of them because we document everything and we know the policy language. A program contractor cannot have that fight. It’s against the agreement they signed.

The “I Already Have Someone” Conversation

This is the moment we want to change.

Adjuster shows up. Tells the homeowner they’ll send out their guy. Their guy arrives, hands the homeowner a piece of paper to sign, and starts work. Homeowner thinks they made a choice. They didn’t. The adjuster made the choice for them.

Then we get a call from a neighbor, a firefighter, or a referral, and the homeowner says “I already have someone.” We ask who. They tell us. And we already know how that job is going to go.

You are allowed to choose any licensed fire restoration company you want. Your insurance policy does not require you to use the adjuster’s recommendation. It does not require you to use anyone on a preferred list. That’s your home, your claim, and your money. You pick.

What an Independent Fire Restoration Company Actually Does

Bedrock does zero program work. We are not on any preferred contractor list. That’s not an accident, it’s the business model.

When you sign with us, here’s what changes.

We dictate the scope based on what your home actually needs, then we present it to the adjuster. We push back, in writing, when the adjuster wants to cut corners. We document with photos, soot testing, thermal imaging, and written reports so the file is bulletproof. We handle the entire claim communication so you’re not on the phone fighting with your carrier while you’re trying to figure out where your family is sleeping next week. We do fire mitigation and rebuild under one roof, so nothing falls through the cracks between phases. We answer when you call. Not a call center, our team.

We get paid the same whether the scope is small or large. Our incentive is to do it right, document it, and stand behind the work. The insurance company does not control our pricing, our scope, or our reputation.

What to Do in the First 24 Hours After a Fire

Take a breath. Nothing has to happen in the next ten minutes.
Then:
  1. Document the damage yourself with your phone. Photos and video of every room, every angle, before anything is moved.
  2. Call two or three independent fire restoration companies. Ask them directly, “Are you on any insurance preferred programs?” If the answer is yes, keep calling.
  3. Do not sign anything the adjuster’s contractor hands you until you’ve talked to at least one independent option.
  4. Once you choose your company, let them handle the adjuster relationship from that point forward.

The companies that show up fast and answer the phone are usually the ones who’ll take care of you. The ones who hand you a clipboard and tell you to sign before they start work are usually the ones with a deal in place somewhere.

Once you’ve picked your contractor, there’s a longer list of housing, financial, and personal items to handle in the first day or two. We put together a full walkthrough here: The First 48 Hours After a Fire: A Homeowner’s Checklist.

The Bottom Line

Your insurance company is a business. Their job is to settle your claim for as little as possible. The adjuster is good at their job. The preferred contractor is good at theirs. Both jobs involve protecting the insurance company’s bottom line.

You need someone on your side of the table. That’s the whole point of hiring an independent fire restoration company. Not because we’re nicer or because we have a fancier truck. Because the contract we sign is with you, not with them.

If you’ve had a fire and an adjuster has already named a contractor, call us before you sign anything. We’ll tell you straight whether you need us or not.
The Bedrock Team 612-834-1501

Can Bedrock Restoration of Edina address sump pump failures in Edina MN basements?

Interior basement waterproofing system installed along concrete foundation walls

Sump pump failures in Edina, MN basements can turn a dry haven into a watery disaster overnight, especially during heavy spring rains near Lake Cornelia or sudden storms along Highway 100. Homeowners in neighborhoods like Parkwood Knolls, Brookview Heights, Sunnyslope, Golf Terrace, and the Country Club District know the risks all too well. The good news is that Bedrock Restoration of Edina, your trusted local water damage experts, stands ready to address these failures head-on with proven, comprehensive solutions. As a family-operated, MN licensed general contractor (#BC787322), Bedrock Restoration specializes in water damage restoration, including sump pump emergencies, delivering 24/7 response to protect Edina properties from further harm.

Understanding Sump Pump Failures in Edina Basements

Sump pumps are the unsung heroes of Edina basements, tirelessly working to keep groundwater at bay in this low-lying area surrounded by natural features like Lake Cornelia and Valley View Park. These devices collect water from basement perimeter drains and pump it away from your foundation, preventing flooding. However, failures happen due to power outages common during Minnesota winters, clogged pits from dirt buildup near major intersections like France Avenue and Vernanda Avenue, worn-out motors from constant use, or float switch malfunctions triggered by debris.

In Edina’s unique climate, with freeze-thaw cycles and proximity to Minnetonka borders and Bredesen Park, sump pumps face extra stress. A single failure can lead to inches of standing water, compromising structural integrity, fostering mold growth behind walls, and damaging stored belongings in family rec rooms or home offices. According to local restoration insights, unchecked sump pump issues often escalate into major basement water damage, requiring extraction, drying, and repairs that Bedrock handles expertly.

Picture this: a homeowner in Highland Village returns from Southdale Center shopping to find their basement flooded after a power flicker during a thunderstorm. Water seeps through cracks, saturates carpets, and threatens the home’s foundation. This scenario repeats across Edina, from Braemar Golf Course vicinities to quiet streets near Southdale Area. Recognizing early signs like unusual humming, frequent cycling, or backup alarms is crucial. Bedrock Restoration’s IICRC-certified technicians arrive swiftly, assessing the damage with thermal imaging and moisture meters to pinpoint the failure’s impact.

Bedrock Restoration’s Expertise in Sump Pump Failure Response

Bedrock Restoration of Edina doesn’t just react to sump pump failures; they resolve them comprehensively. Serving Edina and the Twin Cities metro, their team follows a proven step-by-step process honed from years of handling local floods, leaks, and appliance failures. First, they conduct a thorough inspection and damage assessment, identifying the pump’s failure mode—whether electrical, mechanical, or clogg-related—while mapping moisture throughout the basement.

Next comes rapid water extraction using powerful truck-mounted vacuums, removing gallons of water efficiently even in hard-to-reach corners near Brookview Heights homes. Industrial air movers and dehumidifiers then initiate structural drying, targeting hidden moisture in walls, floors, and joists that could lead to warping or mold. Cleaning and sanitization follow, eliminating contaminants from gray or black water categories often present in sump backups.

What sets Bedrock apart is their full-service approach as a licensed general contractor. Beyond mitigation, they provide reconstruction, including sump pump replacements or upgrades like battery backups ideal for Edina’s frequent outages. Their in-house carpenters, project managers, and plumbers handle everything from drywall repairs to foundation crack sealing, minimizing disruption. For instance, in a recent Country Club District case, Bedrock replaced a failed primary sump pump, installed a dual-system with alarms, and fully restored the basement in under a week, preventing mold and saving the family thousands.

Bedrock’s IICRC certification ensures adherence to the highest industry standards for extraction, drying, and mold prevention. All technicians are fully insured, background-checked, and equipped with state-of-the-art tools like advanced pumps and containment systems. This expertise shines in Edina-specific challenges, such as high water tables near Lake Cornelia or soil saturation after rains around Valley View Park.

Why Sump Pump Failures Demand Immediate Professional Action

Delaying response to a sump pump failure in your Edina basement amplifies risks exponentially. Within 24-48 hours, mold spores activate in damp environments, posing health hazards like respiratory issues, especially for families with children attending nearby schools or playing in local parks. Structural damage emerges as wood swells, concrete cracks, and insulation loses efficacy, potentially costing tens of thousands in repairs.

Bedrock Restoration emphasizes rapid 24/7 response, arriving within the hour to mitigate spread. Their process minimizes long-term damage and costs, with transparent pricing and insurance assistance. Homeowners near Highway 100 or France Avenue benefit from this urgency, as traffic can delay DIY efforts. Real examples from Edina, like a Highland Park burst pipe incident combined with sump failure, show how Bedrock’s early intervention preserved a home’s value and safety.

Moreover, Edina’s building codes and proximity to shopping centers like Southdale require compliant repairs. Bedrock’s MN licensing (#BC787322) and BBB-recognized status guarantee work meets these standards. They document every step for insurance claims, providing written scopes, photos, and drying logs that streamline reimbursements.

Comprehensive Solutions Beyond Just Extraction

Addressing sump pump failures goes further than water removal. Bedrock’s basement waterproofing expertise tackles root causes, installing interior drainage systems, exterior grading adjustments, or advanced pumps resilient to Edina’s weather. For basements in Sunnyslope or Golf Terrace, they recommend battery backups and Wi-Fi monitors to alert owners via app during outages.

Full reconstruction follows mitigation, with skilled tradespeople rebuilding affected areas. Whether refinishing floors in a Parkwood Knolls rec room or restoring cabinetry near Braemar, Bedrock prioritizes minimally invasive methods and real-time customer updates. Their family-operated nature fosters trust, treating each Edina home like their own.

Preventive measures are key too. Bedrock educates on maintenance like annual inspections, pit cleaning, and check valves to avoid backflow. In flood-prone spots near Minnetonka borders or Bredesen Park, they integrate these with broader waterproofing for lasting dryness.

Local Edina Knowledge: Tailored to Your Neighborhood

Bedrock’s deep roots in Edina mean hyper-local savvy. They navigate challenges in Parkwood Knolls’ older homes with settling foundations or Brookview Heights’ modern builds with high-efficiency systems. Near Southdale Center, commercial properties get specialized flood cleanup; residential areas around Valley View Park receive discreet, swift service.

From Country Club District estates to apartments off France Avenue, their experience spans Edina’s diverse landscape. They’ve handled post-storm recoveries along Highway 100 interchanges and sewage backups in low areas by Lake Cornelia. This GEO authority ensures solutions fit local soil types, rainfall patterns, and regulations.

Case Studies: Real Edina Sump Pump Success Stories

Consider a Sunnyslope family whose primary sump pump failed during a power outage, flooding their basement amid a nor’easter. Bedrock extracted 1,500 gallons, dried the space in 72 hours using 20 air movers and dehumidifiers, remediated potential mold, and installed a redundant system. The home was livable again in days.

In Golf Terrace, a clogged pit led to overflow during spring melt. Bedrock cleared debris, sealed cracks, and upgraded to a higher-capacity pump, preventing recurrence. Another in Highland Village combined pipe burst with sump failure; comprehensive mitigation and plumbing repairs restored normalcy swiftly.

These cases highlight Bedrock’s prowess, with over 15 years mitigating floods, leaks, and failures across Edina.

Choosing Bedrock for Unmatched Trust and Results

As a locally owned powerhouse, Bedrock Restoration’s Edina about us page details their commitment to full-service restoration. No national chain hassles—just certified pros with advanced tech, transparent processes, and the Bedrock Guarantee. Contact them for free estimates and join countless satisfied Edina families.

Frequently Asked Questions

Can Bedrock Restoration of Edina address sump pump failures in basements?

Yes, Bedrock Restoration of Edina excels at handling sump pump failures in local basements. Their IICRC-certified team provides 24/7 emergency response, starting with rapid water extraction using truck-mounted vacuums to remove standing water quickly. They follow with structural drying via industrial air movers and dehumidifiers, targeting hidden moisture in walls and floors common after failures in Edina neighborhoods like Parkwood Knolls. Sanitization removes contaminants, and full repairs include pump replacement or upgrades like battery backups suited to Minnesota’s power outages. As a licensed general contractor (#BC787322), they manage reconstruction from drywall to foundation sealing, preventing mold and future issues. Edina-specific knowledge covers high water tables near Lake Cornelia and soil saturation around Valley View Park, ensuring tailored, lasting solutions that restore your basement safely and efficiently.

What causes sump pump failures in Edina MN homes?

Sump pump failures in Edina arise from power outages during storms along Highway 100, clogged pits from dirt buildup in areas like Sunnyslope, worn motors from constant cycling in wet springs near Bredesen Park, or float switch issues from debris. Edina’s freeze-thaw cycles exacerbate mechanical wear, while high groundwater around Lake Cornelia overloads systems. Backup alarms often signal problems early, but ignoring them leads to flooding. Bedrock Restoration assesses these causes during inspections using thermal imaging, recommending preventives like annual maintenance or dual pumps. Their experience in Golf Terrace and Brookview Heights shows most failures are fixable with prompt action, avoiding structural damage and mold in basements.

How quickly does Bedrock respond to sump pump emergencies in Edina?

Bedrock Restoration responds within the hour to sump pump emergencies across Edina, from Country Club District to Southdale Area. Their 24/7 availability ensures certified technicians arrive equipped for immediate mitigation, extracting water and containing spread before it reaches living areas. This speed is vital in Edina’s compact layout, where delays amplify damage near France Avenue homes. Post-response, they provide real-time updates and drying verification, completing most initial mitigations in 24-48 hours. Families in Highland Village praise this urgency, noting restored usability fast without disruption to daily commutes or school runs nearby.

Does Bedrock handle insurance claims for basement sump pump damage?

Absolutely, Bedrock Restoration assists fully with insurance claims for sump pump failures in Edina basements. They document damage with photos, moisture logs, and detailed scopes categorized by water type (clean, gray, black), simplifying adjuster approvals. Transparent pricing and no hidden fees build trust, while their MN licensing (#BC787322) and BBB status reassure insurers. In cases near Minnetonka borders or Braemar, they’ve secured full coverage for extraction, drying, pump installs, and rebuilds. Homeowners report seamless processes, with Bedrock coordinating directly to minimize out-of-pocket costs and stress.

Can sump pump failures lead to mold in Edina basements?

Yes, sump pump failures often spark mold growth in Edina basements within 48 hours if unaddressed, thriving in damp conditions post-flooding near Lake Cornelia. Hidden moisture behind walls in Parkwood Knolls homes fuels spores, causing health risks. Bedrock prevents this with thorough drying using dehumidifiers, air quality testing, and remediation protocols. Their IICRC training ensures complete removal, as seen in Golf Terrace cases where mold was eradicated alongside pump repairs, restoring safe, dry spaces without recurrence.

What equipment does Bedrock use for sump pump failure restoration?

Bedrock employs state-of-the-art gear for sump pump failures, including truck-mount extractors for rapid water removal, industrial air movers (up to 20 units), powerful dehumidifiers, thermal imaging cameras, and moisture meters for precise detection. Containment tools isolate areas in Brookview Heights basements, while antimicrobial treatments sanitize. For repairs, they install high-capacity pumps with alarms suited to Edina’s climate. This advanced tech, backed by IICRC standards, ensures efficient, verifiable drying and prevention.

Is Bedrock Restoration certified for water damage in Edina?

Yes, all Bedrock Restoration technicians serving Edina are IICRC-certified in water damage restoration, upholding top standards for extraction, drying, and mold prevention. Fully insured and licensed (#BC787322), they handle sump pump issues with expertise from years in Sunnyslope and Highland Park. Background-checked staff prioritize safety, using PPE and best practices for every job.

How much does sump pump failure repair cost in Edina with Bedrock?

Costs vary by damage extent but start with a free, transparent estimate from Bedrock after 24/7 inspection. Expect coverage for extraction, drying, and repairs, with minimal surprises. Insurance often offsets most, as in Southdale Area cases where full basements were restored affordably. Factors like water volume near Valley View Park influence pricing, but their efficiency keeps it competitive.

Does Bedrock offer sump pump maintenance or prevention in Edina?

Bedrock provides preventive services including inspections, cleaning, and upgrades like battery backups for Edina homes. They seal cracks and improve drainage in flood-prone spots like France Avenue, preventing failures. Annual checkups catch issues early, saving costs long-term for Country Club District properties.

Why choose Bedrock over other restorers for Edina sump pumps?

Bedrock’s family-operated, local focus, IICRC certification, 24/7 response, full reconstruction, and Edina-specific knowledge set them apart. No chains—just trusted pros with the Bedrock Guarantee, advanced tools, and insurance savvy. Reviews from Braemar to Highland Village confirm reliability for sump pump crises.

Why Can’t a Restoration Company Give Me a Quote Right Away?

Because too much is unknown before proper assessment. Asking for an exact quote before inspection is like asking a doctor how much knee surgery will cost before they’ve done x-rays. There’s critical information that can only be gathered through testing, time, and careful evaluation. Restoration companies need to discover what materials are wet, how far water traveled, and what can be saved versus what must be replaced.

This isn’t evasion—it’s honesty about how water damage actually works.

The Doctor Analogy: Diagnosis Before Treatment

The medical comparison is apt because water damage restoration follows a similar process:

Initial exam. The doctor looks at your knee, asks questions, and identifies obvious issues. A restoration technician walks through your home, notes visible damage, and takes preliminary moisture readings.

Testing and imaging. X-rays and MRIs reveal what’s happening inside—damage invisible to the naked eye. Moisture meters, thermal imaging, and inspection behind walls reveal how far water actually traveled.

Diagnosis develops over time. Sometimes the doctor discovers additional problems during treatment. Similarly, opening walls or lifting flooring sometimes reveals damage that wasn’t apparent initially.

Treatment plan adjusts accordingly. The final scope and cost become clear only after full assessment. Rushing to a price before understanding the problem leads to either underestimating (and surprise bills later) or overestimating (and unnecessary work).

Homeowners in Minneapolis, Eden Prairie, and St. Louis Park benefit from companies that take assessment seriously rather than guessing at prices.

What’s Unknown on Day One

When a restoration company first arrives, they can see some things but not others:

Visible on arrival:

  • Standing water on floors
  • Obvious wet carpet or flooring
  • Water stains on walls or ceilings
  • The general affected area

Hidden until testing:

  • How high moisture wicked up inside walls
  • Whether water reached adjacent rooms through hidden paths
  • Moisture levels in subfloor beneath flooring
  • Saturation depth in structural materials
  • Condition of insulation inside wall cavities

Unknown until drying begins:

  • Which materials can be dried in place versus removed
  • Whether hardwood floors will stabilize or require replacement
  • Total equipment needs and drying duration
  • Hidden mold or damage behind surfaces

Water is deceptive. A wet spot on your ceiling might trace back to a bathroom two rooms away. A damp baseboard might indicate saturation three feet up inside the wall. These discoveries happen through systematic assessment, not guesswork.

How the Discovery Process Works

Professional restoration companies follow a methodical approach to understand your damage:

Day one: Initial assessment. Technicians document visible damage, take preliminary moisture readings at multiple points, identify the water source, and categorize the water type (clean, gray, or contaminated). This provides enough information for a rough estimate range.

Days one through three: Detailed moisture mapping. Using specialized meters and thermal imaging, technicians map exactly where moisture exists throughout affected areas. This reveals the true scope—often larger than what’s visible.

During drying: Ongoing discovery. As equipment runs and materials dry, additional information emerges. Walls opened for airflow may reveal unexpected damage. Flooring behavior during drying indicates whether it’s salvageable. Moisture readings track progress and confirm when drying is complete.

After drying: Final scope confirmation. Only when everything is dry and exposed can accurate repair estimates be generated. Now technicians know exactly what needs replacing and can price accordingly.

Homeowners in Minnetonka, Edina, and Bloomington who understand this process have realistic expectations about estimate timing.

When You Can Expect Accurate Pricing

Different phases allow for different pricing accuracy:

Immediately (day one):

  • Rough ballpark range based on visible damage
  • General magnitude (minor, moderate, severe)
  • Not reliable for budgeting purposes

Within 24-48 hours:

  • Reasonably accurate mitigation estimate
  • Equipment needs and expected duration
  • Material removal scope

After drying completes (days 5-10):

  • Accurate repair and reconstruction estimates
  • Specific material and labor costs
  • Final project pricing

After insurance review:

  • Confirmed coverage amounts
  • Any gaps between estimate and approved scope
  • Final out-of-pocket expectations

Rushing this timeline produces unreliable numbers. A company quoting exact costs on day one is either guessing or planning to adjust later.

What Reputable Companies Tell You Upfront

Honest restoration companies communicate clearly about what they know and don’t know:

What they should tell you early:

  • Preliminary assessment of damage severity
  • Estimated range for mitigation costs
  • Expected timeline for drying
  • When more accurate pricing will be available
  • How they’ll communicate as scope develops

What they shouldn’t claim to know:

  • Exact final project cost before assessment
  • Precise repair pricing before drying completes
  • Guaranteed timelines before seeing full scope
  • Whether insurance will cover everything

Transparency about uncertainty is actually a sign of professionalism. Companies that acknowledge unknowns upfront are less likely to surprise you later.

Red Flags: Companies That Quote Immediately

Be cautious of companies that provide exact pricing too quickly:

  • Firm quotes before inspecting the property: Impossible without seeing the damage
  • Exact final costs on day one: No one can know this before assessment
  • “We’ll figure out the price later”: Vague promises lead to disputes
  • Dramatically lower quotes than competitors: May indicate corners being cut or change orders coming
  • Pressure to sign contracts before assessment completes: Protects them, not you
  • Unwillingness to explain their pricing process: Transparency should be standard

A company that seems to have all the answers immediately either has done this exact situation hundreds of times (unlikely, since every home differs) or is telling you what you want to hear rather than what’s true.

Homeowners in Chanhassen, Plymouth, and throughout the Twin Cities should value honest uncertainty over false confidence.

Questions to Ask About the Estimate Process

Get clarity on how pricing will develop:

  1. “What can you tell me today about likely costs?” Expect ranges, not exact figures.
  2. “When will I have a firm mitigation estimate?” Should be within 24-48 hours.
  3. “How will you communicate if scope changes?” Look for clear processes, not vague assurances.
  4. “When will accurate repair pricing be available?” After drying completes is the honest answer.
  5. “What factors might increase the final cost?” Honest companies discuss variables proactively.

The Bottom Line: Discovery Takes Time

Day one provides:

  • General damage assessment
  • Rough cost ranges
  • Understanding of scope magnitude

The following days reveal:

  • True extent of moisture spread
  • What’s salvageable versus replaceable
  • Accurate mitigation costs

After drying shows:

  • Complete repair requirements
  • Final material and labor pricing
  • Reliable project budgets

Patience pays off:

  • Accurate estimates prevent surprises
  • Proper assessment ensures complete restoration
  • Honest timelines build trust

Next Steps for Twin Cities Homeowners

If you’re dealing with water damage in Minneapolis, Wayzata, Savage, or anywhere in the metro area, expect the pricing process to unfold over days, not hours.

Work with a company that explains what they know, acknowledges what they don’t, and keeps you informed as the full picture develops. The right partner values accuracy over speed—because getting it right matters more than giving you a number you want to hear.


How Much Does Water Damage Restoration Cost?

Cost depends entirely on the extent of damage, materials affected, and how quickly mitigation begins. Equipment costs, labor, material removal, and eventual repairs all contribute to the final price. Reputable companies provide ballpark estimates early, but the complete picture develops over time as drying reveals the full scope of damage.

Understanding what drives costs helps you evaluate estimates and recognize fair pricing.

Why Water Damage Costs Vary So Widely

No two water damage situations are identical. A small leak caught immediately costs a fraction of a major flood discovered days later. Variables that create this range include:

Volume of water involved. A dishwasher leak affecting one room requires less equipment and labor than a burst pipe that flooded an entire basement.

Materials affected. Carpet and drywall are relatively straightforward. Hardwood flooring, custom cabinets, and specialty finishes increase complexity and cost significantly.

How quickly you respond. Water addressed within hours causes less damage than water sitting for days. Delayed response means more extensive drying, more material removal, and higher reconstruction costs.

Contamination level. Clean water from a supply line requires standard mitigation. Sewage backups or floodwater require additional safety protocols, protective equipment, and disposal procedures.

Home size and layout. A 1,500-square-foot rambler dries differently than a 4,000-square-foot multi-level home. More space means more equipment and longer timelines.

Homeowners in Minneapolis, Eden Prairie, and St. Louis Park receive estimates ranging from modest to substantial based on these variables.

Factors That Drive Mitigation Costs

The emergency drying phase has its own cost components:

Equipment rental and operation. Commercial air movers, dehumidifiers, and specialty drying systems cost money for every day they operate. More severe damage requires more equipment running for more days.

Labor for setup, monitoring, and adjustment. Technicians visit daily to take moisture readings, reposition equipment, and document progress. This skilled labor is part of the mitigation cost.

Material removal. Removing wet carpet padding, cutting out saturated drywall, and disposing of unsalvageable materials requires labor and disposal fees.

Antimicrobial treatments. Preventing mold growth requires applying treatments to affected materials—another line item in mitigation costs.

Documentation and testing. Proper moisture monitoring, photo documentation, and final clearance testing ensure the job is done right and support insurance claims.

Complex situations—like water affecting multiple floors or penetrating wall cavities extensively—require more of everything: more equipment, more monitoring, more removal, more time.

Factors That Drive Repair Costs

Once drying completes, reconstruction costs depend on what needs replacing:

Drywall and finishing. The amount of drywall removed during mitigation directly affects repair costs. Matching existing texture adds complexity.

Flooring type. Replacing carpet is straightforward. Replacing hardwood, tile, or specialty flooring costs more—especially when matching existing materials.

Cabinets and built-ins. Custom cabinets cost significantly more to replace than stock options. Built-in shelving and specialty millwork add to reconstruction budgets.

Paint and trim. Repainting affected areas and reinstalling trim seems minor but adds up, especially in larger spaces.

Structural repairs. If water damaged framing, subfloor, or other structural elements, repairs become more extensive and costly.

Homeowners in Minnetonka, Edina, and Bloomington with custom finishes or older homes requiring material matching typically see higher repair costs than those with standard construction.

Why Accurate Pricing Takes Time

Restoration companies can’t give precise final costs immediately, and here’s why that’s actually honest:

Water travels hidden paths. The visible damage on day one rarely represents the full scope. Moisture testing over several days reveals how far water actually spread.

Drying exposes hidden damage. Once walls open up and materials dry, additional problems sometimes appear—damage to framing, subfloor deterioration, or mold that wasn’t initially visible.

Material decisions happen during the process. Whether hardwood floors can be saved or must be replaced often isn’t clear until drying is attempted. Same with cabinets, drywall, and other materials.

Insurance involvement affects scope. What your policy covers influences decisions about repair approaches and material selections.

A company that quotes an exact final price before assessment is either guessing or planning to surprise you with change orders later.

What to Expect From the Estimate Process

Reputable restoration companies follow a predictable pricing timeline:

Initial assessment (day one): A ballpark range based on visible damage, affected area size, and preliminary moisture readings. This helps you understand magnitude but isn’t a final quote.

Mitigation estimate (days 1-2): More specific pricing for the emergency drying phase, including equipment needs and expected duration.

Ongoing updates (during drying): As the full scope becomes clear, the company updates estimates and communicates any changes.

Repair estimate (after drying completes): Once everything is dry and exposed, accurate reconstruction pricing is possible. This is when you’ll know full project costs.

Insurance coordination (throughout): Companies experienced with insurance communicate with adjusters, submit documentation, and help ensure approved amounts align with actual costs.

Homeowners in Chanhassen, Plymouth, and throughout the Twin Cities should expect this phased approach from professional restoration companies.

Red Flags in Restoration Pricing

Watch for these warning signs when evaluating estimates:

  • Exact final pricing before assessment: No one can know total costs before seeing the full damage
  • Dramatically lower estimates than competitors: May indicate cutting corners, hidden fees later, or inexperience
  • No written estimates: Verbal quotes leave you unprotected if costs balloon
  • Pressure to sign immediately: Legitimate companies allow reasonable time for decisions
  • Unwillingness to explain line items: You deserve to understand what you’re paying for
  • Estimates that don’t mention potential variables: Honest companies acknowledge unknowns upfront
  • No discussion of insurance process: Experienced companies address coverage questions early

Questions to Ask About Pricing

Get clear answers before work begins:

  1. “What’s your best estimate range for the mitigation phase?” This should be reasonably predictable after initial assessment.
  2. “How will you communicate if costs increase?” Professional companies have clear processes for scope changes.
  3. “When will I have accurate repair pricing?” Expect this after drying completes and full damage is visible.
  4. “How do you work with insurance on pricing?” Companies experienced with claims can explain this process clearly.
  5. “What factors might increase the final cost?” Honest companies discuss variables like hidden damage or material complications.

The Bottom Line: Pricing Develops Over Time

Early in the process:

  • Expect ballpark ranges, not exact quotes
  • Mitigation costs become clear within days
  • Variables remain until drying reveals full scope

After drying completes:

  • Accurate repair estimates are possible
  • Material selections finalize pricing
  • Insurance approval clarifies coverage

Throughout the project:

  • Communication should be proactive
  • Changes should be documented and explained
  • No surprises at final invoice

Next Steps for Twin Cities Homeowners

If you’re dealing with water damage in Minneapolis, Wayzata, Savage, or anywhere in the metro area, focus on stopping the damage first—pricing details develop as the project unfolds.

Work with a company that communicates transparently about costs, explains what drives pricing, and keeps you informed as the scope becomes clear. The right partner provides honest estimates early and avoids surprises at the end.


How Long Does Water Damage Restoration Take? A Realistic Timeline

Drying typically takes 3-7 days depending on damage severity. Repairs begin after drying completes and insurance approves the scope, with timelines varying based on material availability, approval speed, and how extensive the damage is. A minor leak might resolve in two weeks total. A major flood affecting multiple rooms could take two months or longer.

Understanding what drives these timelines helps you plan accordingly and recognize when a company is being honest versus overpromising.

The Two-Phase Timeline: Drying Then Repairs

Water damage restoration happens in two distinct phases, each with its own timeline:

Phase 1: Mitigation and Drying (3-7 days)

This emergency phase begins immediately and includes water extraction, equipment setup, and active drying. Technicians monitor moisture levels daily and adjust equipment until readings confirm the structure is dry.

Phase 2: Restoration and Repairs (1-4+ weeks)

Once drying is verified, rebuilding begins. This phase includes replacing drywall, flooring, cabinets, and finishing work like painting and trim. Timeline depends heavily on scope and material availability.

The gap between phases (1-3 weeks)

Insurance approval, estimate preparation, material ordering, and scheduling create a natural pause between drying and repairs. This isn’t wasted time—it ensures everyone agrees on scope before work begins.

Homeowners in Minneapolis, Eden Prairie, and St. Louis Park often find the total process takes longer than expected, but each step exists for good reason.

What Affects Drying Time

Several factors determine whether your home dries in three days or seven:

Amount of water involved. A small appliance leak dries faster than a basement with six inches of standing water. More water means more moisture absorbed into materials.

Materials affected. Carpet and drywall dry relatively quickly. Hardwood floors, plaster walls, and concrete take significantly longer. Homes with multiple material types require balancing different drying rates.

How quickly mitigation began. Water that sat for 48 hours before extraction penetrates deeper than water addressed within hours. Delayed response extends drying time.

Home construction and layout. Finished basements, interior bathrooms without windows, and homes with limited airflow require more equipment and more time. Older homes in Minnetonka and Edina with plaster walls often dry slower than newer construction.

Weather and humidity. Minnesota summers with high humidity slow drying. Winter’s dry air can help, though frozen pipes create their own complications.

Equipment quantity and placement. More severe damage requires more air movers and dehumidifiers, strategically positioned and adjusted throughout the drying process.

What Affects Repair Timeline

Once drying completes, repair speed depends on different factors:

Scope of damage. Replacing drywall in one room takes days. Rebuilding an entire basement takes weeks. The amount of work directly drives the timeline.

Insurance approval process. Before major repairs begin, insurance typically reviews and approves the restoration estimate. This can take days or weeks depending on your insurer and claim complexity.

Material availability. Standard drywall and carpet are readily available. Matching existing hardwood, custom cabinets, or specialty tile may require ordering and waiting. Supply chain delays can extend timelines unpredictably.

Contractor scheduling. Restoration companies manage multiple projects. Your repair phase is scheduled based on crew availability and workflow. Peak seasons after storms may create longer waits.

Permit requirements. Some repairs require building permits and inspections, adding administrative time to the process.

Homeowners in Bloomington, Chanhassen, and Plymouth with custom finishes or specialty materials should expect longer timelines than those with standard construction.

Sample Timelines by Damage Severity

Every situation differs, but these examples illustrate typical ranges:

Minor damage (small leak, one room, caught quickly):

  • Drying: 3-4 days
  • Insurance/scheduling gap: 1 week
  • Repairs: 3-5 days
  • Total: 2-3 weeks

Moderate damage (appliance failure, multiple rooms, some drywall removal):

  • Drying: 4-5 days
  • Insurance/scheduling gap: 1-2 weeks
  • Repairs: 1-2 weeks
  • Total: 4-6 weeks

Severe damage (major flood, basement or multiple floors, extensive removal):

  • Drying: 5-7 days
  • Insurance/scheduling gap: 2-3 weeks
  • Repairs: 3-6 weeks
  • Total: 6-10 weeks

Catastrophic damage (whole-home impact, structural concerns):

  • Timeline varies dramatically—potentially 3-6 months for complete restoration

These ranges assume reasonably prompt insurance response and material availability. Complications extend any timeline.

Why Rushing the Process Backfires

Pressure to “just get it done” is understandable but counterproductive:

Rushing drying causes mold. Installing new drywall before studs fully dry traps moisture inside walls. Mold appears within weeks, requiring tear-out and starting over. A few extra days of drying prevents months of additional problems.

Rushing repairs shows in quality. Drywall finishing, painting, and flooring installation require proper technique and drying time between coats. Rushed work looks rushed—and you’ll live with visible defects.

Skipping insurance approval creates payment problems. Starting major repairs before approval risks discovering insurance won’t cover the work as completed. Patience during the approval process protects your finances.

Cutting corners on materials disappoints long-term. Quick-ship replacements may not match your existing finishes. Waiting for proper materials ensures your home looks right when complete.

Red Flags: Unrealistic Timeline Promises

Be cautious of companies that promise suspiciously fast timelines:

  • “We’ll have you back to normal in 48 hours” for anything beyond a tiny leak
  • Removing drying equipment before moisture readings confirm dryness
  • Starting repairs the same day as water extraction
  • Guaranteeing completion dates before seeing the damage
  • Pressure to skip insurance involvement to “speed things up”

Honest companies explain realistic timelines upfront and keep you informed as the process unfolds. They’d rather set accurate expectations than overpromise and underdeliver.

The Bottom Line: Realistic Expectations

Drying phase: 3-7 days

  • Cannot be rushed without risking mold
  • Daily monitoring confirms progress
  • Complete when moisture readings verify dryness

Repair phase: 1-6+ weeks

  • Begins after drying and insurance approval
  • Timeline scales with damage scope
  • Material availability affects scheduling

Communication throughout:

  • Expect regular updates on progress
  • Ask questions when timelines shift
  • A good company explains delays honestly

Next Steps for Twin Cities Homeowners

If you’re dealing with water damage in Minneapolis, Wayzata, Savage, or anywhere in the metro area, ask your restoration company for a realistic timeline estimate based on your specific situation.

Work with a company that communicates proactively throughout the process, explaining what’s happening at each phase and why. The right partner keeps you informed from emergency response through final repairs—no surprises, no false promises.


How to Find the Source of Water Damage in Your Home: A Step-by-Step Guide

The most reliable method is to follow the water trail back to its origin. Start where you see the most moisture and work backward, checking nearby appliances, plumbing connections, walls, and ceilings along the way. Some sources are immediately obvious, while others hide behind drywall or under flooring and require specialized detection equipment to locate.

Finding the source quickly is critical because water damage spreads fast, and the longer a leak continues, the more extensive the repairs become.

Start With the Obvious: Check Nearby Appliances and Fixtures

Before assuming the worst, inspect the most common culprits within ten feet of where you found water:

  • Washing machines: Check supply hoses for cracks, bulges, or loose connections
  • Dishwashers: Look under and behind the unit for pooling water or corroded fittings
  • Water heaters: Inspect the base, pressure relief valve, and inlet/outlet connections
  • Refrigerators with ice makers: Examine the water supply line running to the back
  • Toilets: Check the base for seepage, the supply line, and inside the tank
  • Sinks: Look under cabinets for drips from supply lines, drain pipes, or garbage disposals

Run each appliance and watch for active dripping. Sometimes leaks only appear when the fixture is in use.

Follow the Water Trail: Reading the Clues

Water follows gravity, but it also travels along unexpected paths. Understanding how water moves helps you trace it to its source.

Key principles:

  • Water always flows downhill, but it can travel horizontally along pipes, joists, or other surfaces before dropping
  • The wet spot you see may be far from the actual leak location
  • Stains often appear darker at the edges where water evaporates slowest
  • Fresh water is clear; older leaks leave brownish or yellowish discoloration

Tracking technique: Place your hand on the wet area and feel which direction is wettest. Move toward increasing moisture until you find the origin point or hit a wall.

Common Hidden Water Sources by Room

Different areas of your home have different likely culprits. Here’s where to look based on where you found the water:

Basement water in Minneapolis-area homes:

  • Foundation cracks allowing groundwater seepage
  • Failed sump pump or overwhelmed drainage system
  • Condensation on cold water pipes during humid summers
  • Water heater failures (common location for this appliance)

Ceiling stains or drips:

  • Bathroom directly above (toilet seal, shower pan, supply lines)
  • Roof leak traveling along rafters before dripping down
  • HVAC condensate line clogs or overflows
  • Ice dams during Minnesota winters forcing water under shingles

Kitchen water damage:

  • Dishwasher door seals or drain hose failures
  • Garbage disposal connections
  • Supply lines under the sink
  • Refrigerator ice maker lines (often hidden behind the unit)

Signs the Water Source Is Behind Walls or Ceilings

Some leaks never show themselves directly. Watch for these indicators that water is traveling inside your walls:

  • Bubbling or peeling paint: Moisture trapped behind the surface pushes paint away
  • Soft or warped drywall: Gently press on walls near water stains; sponginess indicates saturation
  • Musty odors without visible mold: Hidden moisture creates conditions for mold growth you can smell but not see
  • Unexplained increase in water bills: A sudden spike often means water is running continuously somewhere
  • Sound of running water when nothing is on: Listen carefully near walls, especially at night when the house is quiet

Homeowners in Edina, Eden Prairie, and St. Louis Park with older plumbing should be especially vigilant for these warning signs.

When DIY Detection Isn’t Enough

Some water sources simply cannot be found without professional equipment:

Thermal imaging cameras detect temperature differences behind walls, revealing wet insulation or hidden moisture that’s invisible to the eye.

Moisture meters measure saturation levels in building materials, helping technicians map exactly how far water has traveled.

Acoustic detection equipment pinpoints leaks in pressurized pipes by amplifying the sound of escaping water.

Borescope cameras allow visual inspection inside wall cavities through small holes, confirming suspected leak locations before opening walls.

If you’ve checked all visible sources and the water keeps appearing, professional detection saves time and prevents unnecessary demolition.

Red Flags That Indicate a Serious Hidden Leak

Call for professional help immediately if you notice:

  • Water appearing in multiple rooms simultaneously: Suggests a main supply line issue
  • Water stains that grow larger daily: The leak is active and ongoing
  • Wet carpet or flooring far from any fixture: Indicates water traveling under your subfloor
  • Mold growth accompanying the moisture: The leak has existed long enough for biological growth
  • Water pressure dropping throughout your home: Points to a significant pipe failure
  • Sewer smell accompanying the water: May indicate drain line backup rather than supply leak

These situations typically require immediate mitigation to prevent structural damage and health hazards.

Why Finding the Source Fast Matters

Every hour water continues flowing, damage expands:

  • Within 24 hours: Drywall begins absorbing moisture, furniture and belongings start swelling
  • Within 48 hours: Mold spores can begin colonizing damp materials
  • Within one week: Structural materials weaken, and remediation costs increase significantly

For homeowners in Minnetonka, Chanhassen, Bloomington, and throughout the Twin Cities, Minnesota’s humidity levels during summer months accelerate mold growth once moisture is present.

The Bottom Line: DIY vs. Professional Detection

Handle it yourself if: The source is visible, accessible, and easily traced to a specific appliance or fixture you can see and touch.

Call a professional if: You’ve checked obvious sources without finding the leak, water keeps returning, you suspect the source is behind walls or under floors, or you notice any red flags listed above.

Either way: Stop the water if possible by shutting off the supply valve to the suspected fixture, or the main water shutoff if you can’t locate the source.

Next Steps for Twin Cities Homeowners

If you’ve found water damage in your home and can’t pinpoint the source, don’t wait and hope it stops on its own. Water damage worsens quickly, and hidden leaks cause the most expensive repairs.

Contact a restoration company with professional detection equipment to locate the source, stop the damage, and document everything for insurance purposes.


How to Dry Wet Floors and Walls After Water Damage: What Actually Works


Effective drying requires getting hot, dry air into every wet cavity, not just across visible surfaces.
Pointing a fan at a wet floor might dry what you can see, but moisture trapped behind walls, under flooring, and inside wall cavities continues causing damage invisibly. Proper structural drying reaches into these hidden spaces to remove all moisture before mold growth begins.

The difference between surface drying and complete drying often determines whether you face minor repairs or major reconstruction.

Why a Box Fan in the Room Won’t Cut It

A common misconception is that air movement alone dries water damage. Here’s why that approach fails:

Surface evaporation isn’t the problem. Visible water on your floor evaporates relatively quickly. The real threat is moisture that has wicked into porous materials like drywall, insulation, subfloor, and carpet padding.

Trapped moisture stays trapped. Wall cavities, the space between subfloor and finished flooring, and areas behind baseboards create pockets where humid air sits stagnant. A fan in the middle of the room never reaches these spaces.

You can’t dry what you can’t reach. Wet insulation inside a wall cavity will hold moisture for weeks unless you create airflow specifically targeting that space.

Homeowners in Minneapolis, St. Louis Park, and throughout the Twin Cities often discover mold months later in walls they thought were dry because surface drying looked complete.

The Science Behind Proper Structural Drying

Effective water damage drying relies on four factors working together:

Temperature: Warmer air holds more moisture and accelerates evaporation from wet materials. Drying slows dramatically below 70°F.

Humidity: Lowering the relative humidity in the space creates a vapor pressure difference that pulls moisture out of wet materials.

Airflow: Moving air across wet surfaces carries away evaporated moisture, but only if that air can reach the wet material.

Time: Even with optimal conditions, structural materials need days to dry completely—there’s no instant fix.

Professional drying systems balance all four factors simultaneously, adjusting as conditions change throughout the drying process.

What You Can Do Immediately (First 30 Minutes)

Quick action limits how far water spreads and reduces total damage. Here’s what to do right away:

  1. Stop the water source if it’s still flowing—shut off the valve or main water supply
  2. Extract standing water using a wet/dry vacuum, mops, or towels
  3. Remove saturated rugs and small furniture to prevent further absorption and allow airflow
  4. Pull up carpet corners if possible to expose wet padding underneath
  5. Open cabinet doors and closets to increase air circulation in enclosed spaces
  6. Turn on your HVAC system to begin air circulation (set to fan mode)

These steps buy you time, but they don’t replace proper drying—they just slow the damage progression.

DIY Drying Methods That Help vs. Those That Hurt

Not all home remedies work, and some make things worse.

Methods that help:

  • Running your air conditioning (removes humidity from the air)
  • Using a dehumidifier rated for your space size
  • Opening windows only if outdoor humidity is lower than indoor levels
  • Removing baseboards to allow wall cavities to breathe
  • Pulling back carpet to expose and remove wet padding

Methods that hurt:

  • Using heaters without dehumidification (creates a sauna effect that spreads moisture)
  • Opening windows during humid Minnesota summers (adds moisture to the space)
  • Laying towels over wet carpet and walking on them (pushes water deeper into padding)
  • Closing up the house without dehumidification (traps humid air inside)
  • Painting over damp walls to “seal in” moisture (guarantees mold growth)

The worst mistake is assuming materials are dry because they feel dry to the touch. Surface dryness means almost nothing for structural materials.

Hidden Moisture Traps Most Homeowners Miss

Water travels to places you wouldn’t expect. These hidden areas often retain moisture long after visible surfaces appear dry:

Under vinyl and laminate flooring: Water seeps through seams and gets trapped between the flooring and subfloor with no way to evaporate.

Inside wall cavities: Drywall acts like a sponge, wicking water upward. A wall wet at the base may be saturated three feet up.

Behind kitchen and bathroom cabinets: Toe kicks and enclosed cabinet backs create dead air spaces where moisture lingers.

Carpet padding: This sponge-like material holds enormous amounts of water and dries extremely slowly, even after the carpet above feels dry.

Insulation inside walls: Wet fiberglass insulation loses its insulating value and provides an ideal environment for mold growth.

Homeowners in Eden Prairie, Edina, and Minnetonka with finished basements face particular challenges because moisture can migrate behind finished walls without any visible indication.

Red Flags That Indicate Incomplete Drying

Watch for these warning signs in the days and weeks following water damage:

  • Musty or earthy odors that appear or worsen over time
  • Humidity that won’t drop despite running dehumidifiers
  • Condensation on windows or cold surfaces in the affected area
  • Baseboards or trim that warp or pull away from walls
  • Flooring that buckles, cups, or feels soft underfoot
  • New stains appearing on walls or ceilings near the original damage
  • Persistent dampness when you touch walls or floors

Any of these signs suggest moisture remains trapped in your structure and professional assessment is needed.

Professional Equipment: What It Does and Why It Matters

Restoration professionals use specialized equipment that works differently than consumer products:

Commercial dehumidifiers remove 15-30 gallons of water per day (compared to 2-5 gallons for home units) and operate continuously without the auto-shutoff features that interrupt drying.

Air movers direct high-velocity airflow at specific angles to reach into wall cavities, under flooring, and behind cabinets where moisture hides.

Injectidry systems pump dry air directly into wall cavities, under hardwood floors, and into other enclosed spaces through small ports, drying areas that surface airflow can’t reach.

Moisture meters and thermal imaging monitor drying progress throughout the structure, confirming when materials have reached safe moisture levels rather than guessing.

Professional drying setups typically use multiple pieces of equipment working together, strategically placed based on moisture readings throughout the space.

Timeline: How Long Proper Drying Actually Takes

Complete structural drying takes longer than most homeowners expect:

  • Surface water removal: 1-2 hours with proper extraction equipment
  • Carpet and padding: 24-48 hours with commercial equipment
  • Drywall (not removed): 3-5 days depending on saturation level
  • Hardwood flooring: 5-14 days for complete stabilization
  • Subfloor and structural framing: 3-7 days with proper equipment

Rushing this process or stopping equipment early almost always leads to mold problems or secondary damage that costs more than the original water event.

The Bottom Line: When to DIY vs. Call a Professional

Handle it yourself if: The water affected a small area (under 10 square feet), was from a clean source, didn’t reach walls or flooring, and you caught it within an hour.

Call a professional if: Water reached walls, flooring, or carpet padding; the affected area exceeds 10 square feet; you didn’t discover the water immediately; or you notice any red flags during the drying process.

Always call a professional if: The water came from a contaminated source like sewage, toilet overflow, or floodwater—these situations require specialized handling beyond drying alone.

Next Steps for Twin Cities Homeowners

If you’re dealing with wet floors or walls in Bloomington, Plymouth, Chanhassen, or anywhere in the Minneapolis metro, time is your most valuable resource. Every hour of delayed drying increases the risk of mold growth and structural damage.

Contact a certified restoration company for a moisture assessment to understand exactly how far water has traveled and what proper drying requires for your specific situation.


Is Water Damage Covered by Homeowners Insurance? What Minnesota Homeowners Need to Know

The short answer: It depends on where the water came from and how quickly the damage occurred. Clean water from a burst pipe or sudden appliance failure is often covered by standard homeowners insurance. Water that seeps in from the ground, backs up from sewers, or results from flooding typically requires separate coverage or may not be covered at all.

Your insurance adjuster makes the final determination, but understanding these distinctions helps you know what to expect before you file a claim.

The “Sudden vs. Gradual” Rule That Determines Coverage

Insurance companies distinguish between sudden, accidental damage and gradual damage caused by neglect or deferred maintenance.

Sudden and accidental events (usually covered):

  • A pipe bursts unexpectedly during a Minnesota winter freeze
  • Your washing machine hose fails without warning
  • A water heater ruptures overnight

Gradual damage (typically denied):

  • A slow leak under your sink that went unnoticed for months
  • Seepage through foundation cracks that developed over time
  • Roof damage from years of wear that finally lets water in

The key question adjusters ask: Could this damage have been prevented with reasonable maintenance? If yes, expect pushback on your claim.

Water Sources That Are Typically Covered

Most standard homeowners policies in Eden Prairie, Minnetonka, St. Louis Park, and the broader Twin Cities area cover water damage from:

  • Burst or frozen pipes inside your home
  • Accidental appliance failures (dishwashers, water heaters, washing machines)
  • Sudden roof damage from storms or falling debris
  • Firefighting efforts that cause water damage
  • Accidental overflow from bathtubs or sinks

These scenarios share one common trait: the damage was sudden, unexpected, and not caused by neglect.

Water Sources That Are Usually NOT Covered

Standard homeowners policies typically exclude:

  • Groundwater seepage through foundations or basement walls
  • Sewer or drain backups (requires separate endorsement)
  • Natural flooding from storms, rivers, or snowmelt
  • Sump pump failures (may require additional coverage)
  • Water damage from ongoing maintenance issues

Homeowners in Edina, Chanhassen, and low-lying areas near lakes or rivers should ask their insurance agent specifically about flood and sewer backup endorsements.

Why Professional Documentation Makes or Breaks Your Claim

The difference between a denied claim and an approved one often comes down to documentation quality. Insurance adjusters need clear evidence showing the source of the water, the extent of damage, and the timeline of events.

Professional restoration companies provide:

  • Moisture readings and thermal imaging results
  • Detailed photo and video documentation
  • Written assessments identifying the water source category
  • Itemized damage reports that align with insurance requirements

This documentation gives adjusters what they need to process your claim efficiently, regardless of the outcome.

Red Flags That Can Hurt Your Insurance Claim

Watch for these warning signs that could complicate your claim:

  • Visible mold growth: Suggests the water problem existed long before you reported it
  • Rust or corrosion around pipes: Indicates a slow leak rather than sudden failure
  • Multiple previous claims: May trigger additional scrutiny from your insurer
  • Delayed reporting: Waiting days or weeks to file weakens the “sudden” argument
  • Evidence of DIY repairs: Unpermitted work may void certain coverage provisions

When adjusters see these red flags, they look more closely at whether the damage was truly sudden and accidental.

Common Mistakes Homeowners Make After Water Damage

Avoid these errors that can jeopardize your claim:

  1. Waiting to call for help: Water damage worsens by the hour, and delays suggest the problem wasn’t urgent
  2. Throwing away damaged materials: Adjusters may need to inspect original materials
  3. Not taking photos before cleanup: Document everything before restoration begins
  4. Assuming you’re not covered: Many homeowners skip filing claims for damage that would have been approved

What to Expect From Your Insurance Adjuster

Your adjuster will inspect the property, review documentation, and determine the cause of damage. They’re looking for evidence that supports or contradicts your claim.

Be prepared to answer:

  • When did you first notice the water?
  • What were you doing when the damage occurred?
  • Have you had similar issues before?
  • What maintenance have you performed on plumbing and appliances?

Honest, straightforward answers paired with thorough documentation give you the best chance of a fair outcome.

The Bottom Line: Should You File a Claim?

File a claim if: The damage was sudden, the source is clearly covered (burst pipe, appliance failure), and repair costs significantly exceed your deductible.

Think carefully if: The damage happened gradually, involves groundwater or flooding, or you’re unsure of the water source.

Get professional help either way: A restoration company that documents damage properly sets you up for success whether insurance covers the work or not.

Next Steps for Twin Cities Homeowners

If you’re dealing with water damage in Minneapolis, Bloomington, Plymouth, or anywhere in the Twin Cities metro, start with a professional assessment. Proper documentation protects your interests regardless of how your insurance claim turns out.

Contact a licensed restoration company within hours of discovering water damage to begin mitigation and documentation immediately.