Will My Home Will Be Demolished During Water Damage Restoration?

No—and it shouldn’t. Professional restoration aims for minimal, targeted removal, opening only the areas necessary to let air reach wet materials. The goal is always to save as much as possible while ensuring complete drying. Your home should not look like a demolition site after proper water damage mitigation.

Understanding what removal is appropriate helps you recognize quality work and avoid contractors who tear out more than necessary.

The “Open to Dry” Approach

Modern water damage restoration follows a principle called “open to dry.” Rather than removing everything that got wet, technicians create strategic openings that allow airflow into wall cavities and under flooring.

How it works:

  • Removing baseboards to expose the bottom of wall cavities
  • Cutting drywall at a specific height (often 12-24 inches) rather than floor to ceiling
  • Drilling small holes to allow air movement without removing entire walls
  • Pulling back carpet to remove wet padding while saving the carpet itself
  • Using specialty drying systems that inject air into enclosed spaces

This approach dries structural materials effectively while preserving everything that can be saved. It’s faster, less expensive, and less disruptive than wholesale demolition.

Homeowners in Minneapolis, Eden Prairie, and St. Louis Park are often relieved to learn that targeted removal—not gutting rooms—is the professional standard.

What Typically Gets Removed vs. Saved

Every water damage situation differs, but here’s what usually happens:

Almost always removed:

  • Wet carpet padding (it’s inexpensive, holds enormous water volume, and dries poorly)
  • Wet insulation inside wall cavities (loses effectiveness and harbors mold)
  • Saturated particleboard or pressed wood materials (disintegrates when wet)
  • Any material contaminated by sewage or Category 3 water

Often saved with proper drying:

  • Carpet (if addressed quickly and padding is replaced)
  • Drywall (if caught early and dried properly from both sides)
  • Hardwood flooring (requires specialized technique but often salvageable)
  • Cabinets (solid wood dries well; particleboard is harder to save)
  • Structural framing (almost always dried in place, rarely removed)

Depends on situation:

  • Drywall with extended water exposure or visible mold
  • Laminate and engineered flooring (varies by product and exposure time)
  • Trim and baseboards (often removed for access, sometimes reinstalled)

The key factor is timing. Materials addressed within 24-48 hours have much higher salvage rates than those left wet for days.

Why Less Demolition Is Usually Better

Removing less material benefits you in multiple ways:

Lower repair costs. Every piece of drywall removed must be replaced. Every cabinet demolished needs rebuilding. Targeted removal means less reconstruction expense.

Faster overall timeline. Less demolition means less rebuilding. A job requiring minimal drywall replacement finishes weeks sooner than one requiring whole-room reconstruction.

Less disruption to your life. Living around a small section of removed drywall is manageable. Living in a gutted home for weeks is not.

Reduced insurance disputes. Adjusters question unnecessary removal. Claims documenting why specific materials required demolition process more smoothly than claims for wholesale tear-out.

Environmental responsibility. Construction waste fills landfills. Saving salvageable materials reduces environmental impact.

Homeowners in Minnetonka, Edina, and Bloomington working with professional restoration companies typically see far less demolition than they initially feared.

How Professionals Decide What to Remove

Trained technicians use specific criteria and tools to determine what stays and what goes:

Moisture readings. Meters measure moisture content in drywall, wood, and other materials. Materials within acceptable ranges can dry in place. Materials beyond saturation thresholds may require removal.

Contamination level. Water is categorized by cleanliness. Clean water from supply lines allows more salvage options. Sewage or floodwater requires removing porous materials that contacted contamination.

Material type. Solid wood dries effectively. Particleboard and MDF absorb water and often can’t be saved. Technicians know which materials respond to drying and which don’t.

Time elapsed. Drywall wet for two hours has different prospects than drywall wet for two days. Quick response expands salvage options significantly.

Structural access needs. Sometimes materials are removed not because they’re ruined, but because removing them allows faster, more complete drying of structural elements behind them.

Cost-benefit analysis. Occasionally, removing and replacing a material costs less than the extended drying time required to save it. Good technicians weigh these tradeoffs honestly.

Red Flags: Unnecessary Demolition

Watch for these warning signs that a contractor may be removing more than necessary:

  • “We remove everything to be safe” without assessment or moisture readings
  • Full-height drywall removal when water only affected the lower portion
  • Removing materials before attempting to dry them
  • No explanation for why specific materials need removal
  • Identical removal approach regardless of damage severity
  • Pressure to decide immediately without time to ask questions
  • Significantly more demolition than other estimates suggested

Some contractors prefer demolition because it’s faster and simpler than proper drying technique. Others inflate project scope to increase billing. Neither approach serves your interests.

Homeowners in Chanhassen, Plymouth, and throughout the Twin Cities should ask technicians to explain every removal decision. Reputable companies welcome these questions.

What to Expect Your Home to Look Like During Drying

Even minimal demolition changes your home’s appearance temporarily. Here’s what’s normal:

Lower portions of walls exposed. A “flood cut” removing the bottom 12-24 inches of drywall is standard practice for wall cavity drying. You’ll see exposed studs and potentially insulation removal.

Carpet pulled back or removed. Padding underneath almost always goes. Carpet may be folded back during drying, then re-installed, or removed if unsalvageable.

Baseboards and trim stacked elsewhere. These are often removed for access and reinstalled after repairs. Having them set aside is normal.

Equipment everywhere. Air movers, dehumidifiers, and ducting temporarily fill affected rooms. This looks chaotic but serves a purpose.

Some rooms roped off or inaccessible. Maintaining drying conditions sometimes requires limiting access to affected areas.

Your home will look disrupted during the drying phase. But “disrupted” is very different from “demolished.” A few days of controlled chaos prevents months of reconstruction.

The Bottom Line: Targeted, Not Total

Expect minimal, strategic removal:

  • Baseboards and lower drywall sections
  • Carpet padding (carpet often saved)
  • Wet insulation inside cavities
  • Only materials that can’t be dried effectively

Question extensive demolition:

  • Ask why each removal is necessary
  • Request moisture readings showing material condition
  • Get explanations for scope decisions

Remember the goal:

  • Dry the structure completely
  • Save everything salvageable
  • Minimize disruption and cost
  • Prevent mold and long-term damage

Next Steps for Twin Cities Homeowners

If you’re facing water damage in Minneapolis, Wayzata, Savage, or anywhere in the metro area, don’t assume your home needs gutting. Professional restoration preserves far more than most homeowners expect.

Work with a company that explains their approach, shows you moisture readings, and justifies every removal decision. The right team saves everything possible while ensuring your home dries completely and safely.

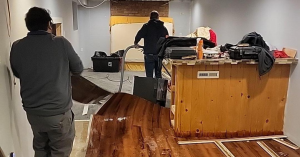
 

Can Any Handyman or Contractor Do Water Damage Restoration?

No. Restoration—especially the drying phase—is a science, not just construction. Knowing what materials to remove, what can dry in place, how to prevent mold growth, and how to avoid structural damage requires specialized training and experience that most general contractors and handymen simply don’t have.

A skilled carpenter can rebuild your walls beautifully. But if those walls weren’t dried properly first, you’ll have mold growing inside them within weeks.

Why Restoration Isn’t Just Construction

Water damage restoration looks like construction work from the outside. Crews remove drywall, pull up flooring, and eventually rebuild what was damaged. But the critical work happens before any rebuilding begins.

Restoration requires understanding water behavior. Water travels unpredictably—wicking upward through drywall, running along pipes, pooling in hidden cavities. Trained technicians know how to trace water paths and identify all affected areas, not just obvious wet spots.

Drying requires precise environmental control. Proper structural drying manipulates temperature, humidity, and airflow simultaneously. It’s not about pointing fans at wet areas—it’s about creating conditions that pull moisture from deep inside materials.

Material decisions have lasting consequences. Some wet materials can be dried in place. Others must be removed immediately. Making the wrong call means either unnecessary demolition costs or hidden moisture that causes mold and rot.

Homeowners in Minneapolis, Eden Prairie, and St. Louis Park who hire unqualified contractors often discover these mistakes months later when mold appears or floors buckle.

The Science Behind Proper Drying

Professional restoration technicians study psychrometry—the science of air, moisture, and drying. This isn’t intuitive knowledge; it’s technical training that covers:

Moisture measurement. Different materials hold moisture differently. Drywall, wood framing, concrete, and carpet each require specific measurement techniques and have different acceptable moisture thresholds.

Drying equipment selection. Commercial air movers, desiccant dehumidifiers, refrigerant dehumidifiers, and specialty systems like injectidry all serve different purposes. Choosing wrong equipment extends drying time or fails to dry hidden areas.

Drying goals and calculations. Technicians calculate how much moisture needs to be removed and how long it should take based on the specific materials, square footage, and conditions. They adjust equipment daily based on readings.

When to remove vs. dry in place. Wet drywall can sometimes be saved if caught early; other times it must go. Hardwood floors might be salvageable with proper technique or ruined by improper drying. These decisions require training and experience.

A handyman might own a shop vac and box fan. That’s not the same as understanding grain depression in hardwood, calculating grains per pound of air, or recognizing when wall cavities need direct airflow injection.

What Specialized Training Covers

Certified restoration technicians complete coursework covering:

  • Water damage restoration principles and practices
  • Structural drying techniques and equipment operation
  • Mold prevention and remediation protocols
  • Health and safety requirements for contaminated water
  • Documentation standards for insurance claims
  • Building science and construction materials behavior

This training takes weeks of classroom and hands-on instruction, followed by examinations. Experienced technicians add years of field work applying these principles across hundreds of different situations.

Homeowners in Minnetonka, Edina, and Bloomington benefit from this expertise because trained professionals have seen situations like theirs before and know what works.

Certifications That Matter

When evaluating restoration companies, look for these credentials:

IICRC Certification. The Institute of Inspection, Cleaning and Restoration Certification sets industry standards. Key certifications include:

  • WRT (Water Damage Restoration Technician)
  • ASD (Applied Structural Drying)
  • AMRT (Applied Microbial Remediation Technician)

State licensing. Minnesota requires general contractor licenses for restoration work involving structural repairs. Verify the company holds a valid MN contractor license.

Insurance and bonding. Proper liability insurance and bonding protect you if something goes wrong during the project.

Manufacturer certifications. Training from equipment manufacturers indicates investment in proper technique and technology.

Ask any company you’re considering what certifications their technicians hold. Reputable companies answer this question proudly.

What Can Go Wrong With Untrained Work

Hiring unqualified contractors for water damage creates specific risks:

Incomplete drying. Without moisture meters and proper monitoring, contractors guess when materials are dry. Guessing wrong means sealing moisture inside your walls—creating perfect conditions for mold growth.

Unnecessary demolition. Untrained workers often remove everything “just to be safe,” destroying salvageable materials and increasing your costs. Trained technicians know what can be saved.

Missed affected areas. Water travels hidden paths. Without understanding water behavior and using detection equipment, contractors miss moisture in adjacent rooms, behind cabinets, or under flooring.

Mold growth. The most common consequence of improper restoration. Mold appears weeks or months later in walls that felt dry but weren’t. Remediation costs far exceed what proper initial drying would have cost.

Insurance claim problems. Adjusters recognize professional documentation. Work performed without proper moisture readings, daily monitoring logs, and photographic evidence may face claim disputes.

Structural damage. Wood framing that stays wet too long weakens. Subfloors warp. Problems that could have been prevented become expensive structural repairs.

Homeowners in Chanhassen, Plymouth, and throughout the Twin Cities who choose contractors based solely on price often pay twice—once for the inadequate initial work and again to fix the resulting problems.

Red Flags When Evaluating Contractors

Watch for these warning signs that suggest inadequate training:

  • No moisture meters or monitoring equipment
  • Cannot explain their drying process or goals
  • No certifications or unwillingness to provide proof
  • Wanting to start repairs before confirming dryness
  • Significantly lower prices than certified restoration companies
  • No documentation or daily progress reports
  • “We’ll just tear it all out” without assessment
  • No experience specifically with water damage (only general construction)

The Bottom Line: Specialized Work Requires Specialists

Restoration technicians are trained in:

  • Water behavior and damage assessment
  • Psychrometry and structural drying science
  • Mold prevention protocols
  • Insurance documentation requirements

General contractors and handymen typically lack:

  • Drying equipment and monitoring tools
  • Training in moisture measurement and drying calculations
  • Experience identifying hidden water damage
  • Understanding of when to remove vs. salvage materials

The repair phase of restoration overlaps with general construction. The critical drying phase does not. Getting drying wrong undermines everything that follows.

Next Steps for Twin Cities Homeowners

If you’re facing water damage in Minneapolis, Wayzata, Savage, or anywhere in the metro area, verify credentials before hiring any company.

Ask about IICRC certifications, request proof of contractor licensing, and choose a company that explains their drying process clearly. The right restoration professional combines construction skills with the specialized science that prevents long-term problems.


How Long Does Water Damage Restoration Take? A Realistic Timeline

Drying typically takes 3-7 days depending on damage severity. Repairs begin after drying completes and insurance approves the scope, with timelines varying based on material availability, approval speed, and how extensive the damage is. A minor leak might resolve in two weeks total. A major flood affecting multiple rooms could take two months or longer.

Understanding what drives these timelines helps you plan accordingly and recognize when a company is being honest versus overpromising.

The Two-Phase Timeline: Drying Then Repairs

Water damage restoration happens in two distinct phases, each with its own timeline:

Phase 1: Mitigation and Drying (3-7 days)

This emergency phase begins immediately and includes water extraction, equipment setup, and active drying. Technicians monitor moisture levels daily and adjust equipment until readings confirm the structure is dry.

Phase 2: Restoration and Repairs (1-4+ weeks)

Once drying is verified, rebuilding begins. This phase includes replacing drywall, flooring, cabinets, and finishing work like painting and trim. Timeline depends heavily on scope and material availability.

The gap between phases (1-3 weeks)

Insurance approval, estimate preparation, material ordering, and scheduling create a natural pause between drying and repairs. This isn’t wasted time—it ensures everyone agrees on scope before work begins.

Homeowners in Minneapolis, Eden Prairie, and St. Louis Park often find the total process takes longer than expected, but each step exists for good reason.

What Affects Drying Time

Several factors determine whether your home dries in three days or seven:

Amount of water involved. A small appliance leak dries faster than a basement with six inches of standing water. More water means more moisture absorbed into materials.

Materials affected. Carpet and drywall dry relatively quickly. Hardwood floors, plaster walls, and concrete take significantly longer. Homes with multiple material types require balancing different drying rates.

How quickly mitigation began. Water that sat for 48 hours before extraction penetrates deeper than water addressed within hours. Delayed response extends drying time.

Home construction and layout. Finished basements, interior bathrooms without windows, and homes with limited airflow require more equipment and more time. Older homes in Minnetonka and Edina with plaster walls often dry slower than newer construction.

Weather and humidity. Minnesota summers with high humidity slow drying. Winter’s dry air can help, though frozen pipes create their own complications.

Equipment quantity and placement. More severe damage requires more air movers and dehumidifiers, strategically positioned and adjusted throughout the drying process.

What Affects Repair Timeline

Once drying completes, repair speed depends on different factors:

Scope of damage. Replacing drywall in one room takes days. Rebuilding an entire basement takes weeks. The amount of work directly drives the timeline.

Insurance approval process. Before major repairs begin, insurance typically reviews and approves the restoration estimate. This can take days or weeks depending on your insurer and claim complexity.

Material availability. Standard drywall and carpet are readily available. Matching existing hardwood, custom cabinets, or specialty tile may require ordering and waiting. Supply chain delays can extend timelines unpredictably.

Contractor scheduling. Restoration companies manage multiple projects. Your repair phase is scheduled based on crew availability and workflow. Peak seasons after storms may create longer waits.

Permit requirements. Some repairs require building permits and inspections, adding administrative time to the process.

Homeowners in Bloomington, Chanhassen, and Plymouth with custom finishes or specialty materials should expect longer timelines than those with standard construction.

Sample Timelines by Damage Severity

Every situation differs, but these examples illustrate typical ranges:

Minor damage (small leak, one room, caught quickly):

  • Drying: 3-4 days
  • Insurance/scheduling gap: 1 week
  • Repairs: 3-5 days
  • Total: 2-3 weeks

Moderate damage (appliance failure, multiple rooms, some drywall removal):

  • Drying: 4-5 days
  • Insurance/scheduling gap: 1-2 weeks
  • Repairs: 1-2 weeks
  • Total: 4-6 weeks

Severe damage (major flood, basement or multiple floors, extensive removal):

  • Drying: 5-7 days
  • Insurance/scheduling gap: 2-3 weeks
  • Repairs: 3-6 weeks
  • Total: 6-10 weeks

Catastrophic damage (whole-home impact, structural concerns):

  • Timeline varies dramatically—potentially 3-6 months for complete restoration

These ranges assume reasonably prompt insurance response and material availability. Complications extend any timeline.

Why Rushing the Process Backfires

Pressure to “just get it done” is understandable but counterproductive:

Rushing drying causes mold. Installing new drywall before studs fully dry traps moisture inside walls. Mold appears within weeks, requiring tear-out and starting over. A few extra days of drying prevents months of additional problems.

Rushing repairs shows in quality. Drywall finishing, painting, and flooring installation require proper technique and drying time between coats. Rushed work looks rushed—and you’ll live with visible defects.

Skipping insurance approval creates payment problems. Starting major repairs before approval risks discovering insurance won’t cover the work as completed. Patience during the approval process protects your finances.

Cutting corners on materials disappoints long-term. Quick-ship replacements may not match your existing finishes. Waiting for proper materials ensures your home looks right when complete.

Red Flags: Unrealistic Timeline Promises

Be cautious of companies that promise suspiciously fast timelines:

  • “We’ll have you back to normal in 48 hours” for anything beyond a tiny leak
  • Removing drying equipment before moisture readings confirm dryness
  • Starting repairs the same day as water extraction
  • Guaranteeing completion dates before seeing the damage
  • Pressure to skip insurance involvement to “speed things up”

Honest companies explain realistic timelines upfront and keep you informed as the process unfolds. They’d rather set accurate expectations than overpromise and underdeliver.

The Bottom Line: Realistic Expectations

Drying phase: 3-7 days

  • Cannot be rushed without risking mold
  • Daily monitoring confirms progress
  • Complete when moisture readings verify dryness

Repair phase: 1-6+ weeks

  • Begins after drying and insurance approval
  • Timeline scales with damage scope
  • Material availability affects scheduling

Communication throughout:

  • Expect regular updates on progress
  • Ask questions when timelines shift
  • A good company explains delays honestly

Next Steps for Twin Cities Homeowners

If you’re dealing with water damage in Minneapolis, Wayzata, Savage, or anywhere in the metro area, ask your restoration company for a realistic timeline estimate based on your specific situation.

Work with a company that communicates proactively throughout the process, explaining what’s happening at each phase and why. The right partner keeps you informed from emergency response through final repairs—no surprises, no false promises.


How to Find the Source of Water Damage in Your Home: A Step-by-Step Guide

The most reliable method is to follow the water trail back to its origin. Start where you see the most moisture and work backward, checking nearby appliances, plumbing connections, walls, and ceilings along the way. Some sources are immediately obvious, while others hide behind drywall or under flooring and require specialized detection equipment to locate.

Finding the source quickly is critical because water damage spreads fast, and the longer a leak continues, the more extensive the repairs become.

Start With the Obvious: Check Nearby Appliances and Fixtures

Before assuming the worst, inspect the most common culprits within ten feet of where you found water:

  • Washing machines: Check supply hoses for cracks, bulges, or loose connections
  • Dishwashers: Look under and behind the unit for pooling water or corroded fittings
  • Water heaters: Inspect the base, pressure relief valve, and inlet/outlet connections
  • Refrigerators with ice makers: Examine the water supply line running to the back
  • Toilets: Check the base for seepage, the supply line, and inside the tank
  • Sinks: Look under cabinets for drips from supply lines, drain pipes, or garbage disposals

Run each appliance and watch for active dripping. Sometimes leaks only appear when the fixture is in use.

Follow the Water Trail: Reading the Clues

Water follows gravity, but it also travels along unexpected paths. Understanding how water moves helps you trace it to its source.

Key principles:

  • Water always flows downhill, but it can travel horizontally along pipes, joists, or other surfaces before dropping
  • The wet spot you see may be far from the actual leak location
  • Stains often appear darker at the edges where water evaporates slowest
  • Fresh water is clear; older leaks leave brownish or yellowish discoloration

Tracking technique: Place your hand on the wet area and feel which direction is wettest. Move toward increasing moisture until you find the origin point or hit a wall.

Common Hidden Water Sources by Room

Different areas of your home have different likely culprits. Here’s where to look based on where you found the water:

Basement water in Minneapolis-area homes:

  • Foundation cracks allowing groundwater seepage
  • Failed sump pump or overwhelmed drainage system
  • Condensation on cold water pipes during humid summers
  • Water heater failures (common location for this appliance)

Ceiling stains or drips:

  • Bathroom directly above (toilet seal, shower pan, supply lines)
  • Roof leak traveling along rafters before dripping down
  • HVAC condensate line clogs or overflows
  • Ice dams during Minnesota winters forcing water under shingles

Kitchen water damage:

  • Dishwasher door seals or drain hose failures
  • Garbage disposal connections
  • Supply lines under the sink
  • Refrigerator ice maker lines (often hidden behind the unit)

Signs the Water Source Is Behind Walls or Ceilings

Some leaks never show themselves directly. Watch for these indicators that water is traveling inside your walls:

  • Bubbling or peeling paint: Moisture trapped behind the surface pushes paint away
  • Soft or warped drywall: Gently press on walls near water stains; sponginess indicates saturation
  • Musty odors without visible mold: Hidden moisture creates conditions for mold growth you can smell but not see
  • Unexplained increase in water bills: A sudden spike often means water is running continuously somewhere
  • Sound of running water when nothing is on: Listen carefully near walls, especially at night when the house is quiet

Homeowners in Edina, Eden Prairie, and St. Louis Park with older plumbing should be especially vigilant for these warning signs.

When DIY Detection Isn’t Enough

Some water sources simply cannot be found without professional equipment:

Thermal imaging cameras detect temperature differences behind walls, revealing wet insulation or hidden moisture that’s invisible to the eye.

Moisture meters measure saturation levels in building materials, helping technicians map exactly how far water has traveled.

Acoustic detection equipment pinpoints leaks in pressurized pipes by amplifying the sound of escaping water.

Borescope cameras allow visual inspection inside wall cavities through small holes, confirming suspected leak locations before opening walls.

If you’ve checked all visible sources and the water keeps appearing, professional detection saves time and prevents unnecessary demolition.

Red Flags That Indicate a Serious Hidden Leak

Call for professional help immediately if you notice:

  • Water appearing in multiple rooms simultaneously: Suggests a main supply line issue
  • Water stains that grow larger daily: The leak is active and ongoing
  • Wet carpet or flooring far from any fixture: Indicates water traveling under your subfloor
  • Mold growth accompanying the moisture: The leak has existed long enough for biological growth
  • Water pressure dropping throughout your home: Points to a significant pipe failure
  • Sewer smell accompanying the water: May indicate drain line backup rather than supply leak

These situations typically require immediate mitigation to prevent structural damage and health hazards.

Why Finding the Source Fast Matters

Every hour water continues flowing, damage expands:

  • Within 24 hours: Drywall begins absorbing moisture, furniture and belongings start swelling
  • Within 48 hours: Mold spores can begin colonizing damp materials
  • Within one week: Structural materials weaken, and remediation costs increase significantly

For homeowners in Minnetonka, Chanhassen, Bloomington, and throughout the Twin Cities, Minnesota’s humidity levels during summer months accelerate mold growth once moisture is present.

The Bottom Line: DIY vs. Professional Detection

Handle it yourself if: The source is visible, accessible, and easily traced to a specific appliance or fixture you can see and touch.

Call a professional if: You’ve checked obvious sources without finding the leak, water keeps returning, you suspect the source is behind walls or under floors, or you notice any red flags listed above.

Either way: Stop the water if possible by shutting off the supply valve to the suspected fixture, or the main water shutoff if you can’t locate the source.

Next Steps for Twin Cities Homeowners

If you’ve found water damage in your home and can’t pinpoint the source, don’t wait and hope it stops on its own. Water damage worsens quickly, and hidden leaks cause the most expensive repairs.

Contact a restoration company with professional detection equipment to locate the source, stop the damage, and document everything for insurance purposes.


How to Dry Wet Floors and Walls After Water Damage: What Actually Works


Effective drying requires getting hot, dry air into every wet cavity, not just across visible surfaces.
Pointing a fan at a wet floor might dry what you can see, but moisture trapped behind walls, under flooring, and inside wall cavities continues causing damage invisibly. Proper structural drying reaches into these hidden spaces to remove all moisture before mold growth begins.

The difference between surface drying and complete drying often determines whether you face minor repairs or major reconstruction.

Why a Box Fan in the Room Won’t Cut It

A common misconception is that air movement alone dries water damage. Here’s why that approach fails:

Surface evaporation isn’t the problem. Visible water on your floor evaporates relatively quickly. The real threat is moisture that has wicked into porous materials like drywall, insulation, subfloor, and carpet padding.

Trapped moisture stays trapped. Wall cavities, the space between subfloor and finished flooring, and areas behind baseboards create pockets where humid air sits stagnant. A fan in the middle of the room never reaches these spaces.

You can’t dry what you can’t reach. Wet insulation inside a wall cavity will hold moisture for weeks unless you create airflow specifically targeting that space.

Homeowners in Minneapolis, St. Louis Park, and throughout the Twin Cities often discover mold months later in walls they thought were dry because surface drying looked complete.

The Science Behind Proper Structural Drying

Effective water damage drying relies on four factors working together:

Temperature: Warmer air holds more moisture and accelerates evaporation from wet materials. Drying slows dramatically below 70°F.

Humidity: Lowering the relative humidity in the space creates a vapor pressure difference that pulls moisture out of wet materials.

Airflow: Moving air across wet surfaces carries away evaporated moisture, but only if that air can reach the wet material.

Time: Even with optimal conditions, structural materials need days to dry completely—there’s no instant fix.

Professional drying systems balance all four factors simultaneously, adjusting as conditions change throughout the drying process.

What You Can Do Immediately (First 30 Minutes)

Quick action limits how far water spreads and reduces total damage. Here’s what to do right away:

  1. Stop the water source if it’s still flowing—shut off the valve or main water supply
  2. Extract standing water using a wet/dry vacuum, mops, or towels
  3. Remove saturated rugs and small furniture to prevent further absorption and allow airflow
  4. Pull up carpet corners if possible to expose wet padding underneath
  5. Open cabinet doors and closets to increase air circulation in enclosed spaces
  6. Turn on your HVAC system to begin air circulation (set to fan mode)

These steps buy you time, but they don’t replace proper drying—they just slow the damage progression.

DIY Drying Methods That Help vs. Those That Hurt

Not all home remedies work, and some make things worse.

Methods that help:

  • Running your air conditioning (removes humidity from the air)
  • Using a dehumidifier rated for your space size
  • Opening windows only if outdoor humidity is lower than indoor levels
  • Removing baseboards to allow wall cavities to breathe
  • Pulling back carpet to expose and remove wet padding

Methods that hurt:

  • Using heaters without dehumidification (creates a sauna effect that spreads moisture)
  • Opening windows during humid Minnesota summers (adds moisture to the space)
  • Laying towels over wet carpet and walking on them (pushes water deeper into padding)
  • Closing up the house without dehumidification (traps humid air inside)
  • Painting over damp walls to “seal in” moisture (guarantees mold growth)

The worst mistake is assuming materials are dry because they feel dry to the touch. Surface dryness means almost nothing for structural materials.

Hidden Moisture Traps Most Homeowners Miss

Water travels to places you wouldn’t expect. These hidden areas often retain moisture long after visible surfaces appear dry:

Under vinyl and laminate flooring: Water seeps through seams and gets trapped between the flooring and subfloor with no way to evaporate.

Inside wall cavities: Drywall acts like a sponge, wicking water upward. A wall wet at the base may be saturated three feet up.

Behind kitchen and bathroom cabinets: Toe kicks and enclosed cabinet backs create dead air spaces where moisture lingers.

Carpet padding: This sponge-like material holds enormous amounts of water and dries extremely slowly, even after the carpet above feels dry.

Insulation inside walls: Wet fiberglass insulation loses its insulating value and provides an ideal environment for mold growth.

Homeowners in Eden Prairie, Edina, and Minnetonka with finished basements face particular challenges because moisture can migrate behind finished walls without any visible indication.

Red Flags That Indicate Incomplete Drying

Watch for these warning signs in the days and weeks following water damage:

  • Musty or earthy odors that appear or worsen over time
  • Humidity that won’t drop despite running dehumidifiers
  • Condensation on windows or cold surfaces in the affected area
  • Baseboards or trim that warp or pull away from walls
  • Flooring that buckles, cups, or feels soft underfoot
  • New stains appearing on walls or ceilings near the original damage
  • Persistent dampness when you touch walls or floors

Any of these signs suggest moisture remains trapped in your structure and professional assessment is needed.

Professional Equipment: What It Does and Why It Matters

Restoration professionals use specialized equipment that works differently than consumer products:

Commercial dehumidifiers remove 15-30 gallons of water per day (compared to 2-5 gallons for home units) and operate continuously without the auto-shutoff features that interrupt drying.

Air movers direct high-velocity airflow at specific angles to reach into wall cavities, under flooring, and behind cabinets where moisture hides.

Injectidry systems pump dry air directly into wall cavities, under hardwood floors, and into other enclosed spaces through small ports, drying areas that surface airflow can’t reach.

Moisture meters and thermal imaging monitor drying progress throughout the structure, confirming when materials have reached safe moisture levels rather than guessing.

Professional drying setups typically use multiple pieces of equipment working together, strategically placed based on moisture readings throughout the space.

Timeline: How Long Proper Drying Actually Takes

Complete structural drying takes longer than most homeowners expect:

  • Surface water removal: 1-2 hours with proper extraction equipment
  • Carpet and padding: 24-48 hours with commercial equipment
  • Drywall (not removed): 3-5 days depending on saturation level
  • Hardwood flooring: 5-14 days for complete stabilization
  • Subfloor and structural framing: 3-7 days with proper equipment

Rushing this process or stopping equipment early almost always leads to mold problems or secondary damage that costs more than the original water event.

The Bottom Line: When to DIY vs. Call a Professional

Handle it yourself if: The water affected a small area (under 10 square feet), was from a clean source, didn’t reach walls or flooring, and you caught it within an hour.

Call a professional if: Water reached walls, flooring, or carpet padding; the affected area exceeds 10 square feet; you didn’t discover the water immediately; or you notice any red flags during the drying process.

Always call a professional if: The water came from a contaminated source like sewage, toilet overflow, or floodwater—these situations require specialized handling beyond drying alone.

Next Steps for Twin Cities Homeowners

If you’re dealing with wet floors or walls in Bloomington, Plymouth, Chanhassen, or anywhere in the Minneapolis metro, time is your most valuable resource. Every hour of delayed drying increases the risk of mold growth and structural damage.

Contact a certified restoration company for a moisture assessment to understand exactly how far water has traveled and what proper drying requires for your specific situation.


Is Water Damage Covered by Homeowners Insurance? What Minnesota Homeowners Need to Know

The short answer: It depends on where the water came from and how quickly the damage occurred. Clean water from a burst pipe or sudden appliance failure is often covered by standard homeowners insurance. Water that seeps in from the ground, backs up from sewers, or results from flooding typically requires separate coverage or may not be covered at all.

Your insurance adjuster makes the final determination, but understanding these distinctions helps you know what to expect before you file a claim.

The “Sudden vs. Gradual” Rule That Determines Coverage

Insurance companies distinguish between sudden, accidental damage and gradual damage caused by neglect or deferred maintenance.

Sudden and accidental events (usually covered):

  • A pipe bursts unexpectedly during a Minnesota winter freeze
  • Your washing machine hose fails without warning
  • A water heater ruptures overnight

Gradual damage (typically denied):

  • A slow leak under your sink that went unnoticed for months
  • Seepage through foundation cracks that developed over time
  • Roof damage from years of wear that finally lets water in

The key question adjusters ask: Could this damage have been prevented with reasonable maintenance? If yes, expect pushback on your claim.

Water Sources That Are Typically Covered

Most standard homeowners policies in Eden Prairie, Minnetonka, St. Louis Park, and the broader Twin Cities area cover water damage from:

  • Burst or frozen pipes inside your home
  • Accidental appliance failures (dishwashers, water heaters, washing machines)
  • Sudden roof damage from storms or falling debris
  • Firefighting efforts that cause water damage
  • Accidental overflow from bathtubs or sinks

These scenarios share one common trait: the damage was sudden, unexpected, and not caused by neglect.

Water Sources That Are Usually NOT Covered

Standard homeowners policies typically exclude:

  • Groundwater seepage through foundations or basement walls
  • Sewer or drain backups (requires separate endorsement)
  • Natural flooding from storms, rivers, or snowmelt
  • Sump pump failures (may require additional coverage)
  • Water damage from ongoing maintenance issues

Homeowners in Edina, Chanhassen, and low-lying areas near lakes or rivers should ask their insurance agent specifically about flood and sewer backup endorsements.

Why Professional Documentation Makes or Breaks Your Claim

The difference between a denied claim and an approved one often comes down to documentation quality. Insurance adjusters need clear evidence showing the source of the water, the extent of damage, and the timeline of events.

Professional restoration companies provide:

  • Moisture readings and thermal imaging results
  • Detailed photo and video documentation
  • Written assessments identifying the water source category
  • Itemized damage reports that align with insurance requirements

This documentation gives adjusters what they need to process your claim efficiently, regardless of the outcome.

Red Flags That Can Hurt Your Insurance Claim

Watch for these warning signs that could complicate your claim:

  • Visible mold growth: Suggests the water problem existed long before you reported it
  • Rust or corrosion around pipes: Indicates a slow leak rather than sudden failure
  • Multiple previous claims: May trigger additional scrutiny from your insurer
  • Delayed reporting: Waiting days or weeks to file weakens the “sudden” argument
  • Evidence of DIY repairs: Unpermitted work may void certain coverage provisions

When adjusters see these red flags, they look more closely at whether the damage was truly sudden and accidental.

Common Mistakes Homeowners Make After Water Damage

Avoid these errors that can jeopardize your claim:

  1. Waiting to call for help: Water damage worsens by the hour, and delays suggest the problem wasn’t urgent
  2. Throwing away damaged materials: Adjusters may need to inspect original materials
  3. Not taking photos before cleanup: Document everything before restoration begins
  4. Assuming you’re not covered: Many homeowners skip filing claims for damage that would have been approved

What to Expect From Your Insurance Adjuster

Your adjuster will inspect the property, review documentation, and determine the cause of damage. They’re looking for evidence that supports or contradicts your claim.

Be prepared to answer:

  • When did you first notice the water?
  • What were you doing when the damage occurred?
  • Have you had similar issues before?
  • What maintenance have you performed on plumbing and appliances?

Honest, straightforward answers paired with thorough documentation give you the best chance of a fair outcome.

The Bottom Line: Should You File a Claim?

File a claim if: The damage was sudden, the source is clearly covered (burst pipe, appliance failure), and repair costs significantly exceed your deductible.

Think carefully if: The damage happened gradually, involves groundwater or flooding, or you’re unsure of the water source.

Get professional help either way: A restoration company that documents damage properly sets you up for success whether insurance covers the work or not.

Next Steps for Twin Cities Homeowners

If you’re dealing with water damage in Minneapolis, Bloomington, Plymouth, or anywhere in the Twin Cities metro, start with a professional assessment. Proper documentation protects your interests regardless of how your insurance claim turns out.

Contact a licensed restoration company within hours of discovering water damage to begin mitigation and documentation immediately.


Residential Water Remediation Service: Restoration Experts

water remediation service

When water invades a home, it disrupts lives in ways that can feel overwhelming. Whether it’s a burst pipe, flooded basement, leaking appliance, or storm damage, water does more than just make things wet. It seeps into structures, fuels mold growth, damages furniture, and threatens the health and safety of entire households. The good news is that with expert help, homes can be restored to a clean, safe, and livable condition again. That’s where residential water remediation service professionals step in, offering solutions designed to not only remove water but also restore homes back to their pre-damage condition.

Bedrock Restoration of Edina is a trusted name in this industry, bringing the experience, training, and technology homeowners need during stressful times. For anyone facing water damage, understanding the process of water remediation is the first step toward regaining peace of mind.

Understanding Water Remediation

Water remediation is not just about drying out a wet carpet or mopping up a puddle after a leak. Instead, it’s a comprehensive process that involves removing standing water, drying affected areas, cleaning contaminated materials, and preventing secondary damage like mold and mildew. The goal is to restore safety, comfort, and structure.

A professional water remediation service includes assessment, extraction, drying, dehumidification, sanitation, and in many cases, even reconstruction. It’s about much more than dealing with water—it’s about eliminating every trace of damage and protecting the home and family from future risks.

When tackling residential problems, experts understand the unique challenges: carpeting, drywall, wood floors, insulation, and valuables all react differently to moisture. Proper water remediation near me requires both expertise and advanced equipment designed to prevent what homeowners fear most—long-term issues hidden behind walls and under floors.

What Happens When Water Damage Is Ignored

Water damage does not fix itself. Left untreated, the smallest leak can become a major problem. For instance, water trapped in drywall weakens the structure, causing swelling, staining, and eventually crumbling. Beneath flooring, moisture warps wood and weakens foundations. If water lingers inside walls, mold colonies can form in under 48 hours.

Professional water remediation service providers know that quick action makes all the difference. Without proper solutions, homeowners face costly repairs, health complications from mold exposure, and serious declines in property value. The hidden dangers of water damage demand proactive solutions—and that begins with remediation experts.

The Critical Steps of Water Remediation

To truly understand what professionals do, it helps to look at the step-by-step process of water remediation:

1. Initial Assessment

Experts inspect the property to identify where water has spread. Moisture detection tools are often used to check areas not visible to the naked eye, such as inside walls or under floors.

2. Water Extraction

Using powerful vacuums and pumps, standing water is removed. Quick extraction helps minimize structural damage.

3. Drying and Dehumidification

Air movers, industrial fans, and dehumidifiers dry out the home. This step is critical to preventing hidden pockets of moisture that lead to mold growth.

4. Cleaning and Sanitizing

Any contaminated items are cleaned thoroughly. Carpets, furniture, and even clothing can often be restored if addressed quickly.

5. Restoration and Repairs

From replacing drywall to refinishing floors or repainting damaged areas, restoration ensures the home returns to its original condition.

Each of these steps is part of a tailored water remediation service, ensuring no damage is overlooked and no risk to homeowners remains hidden.

Residential Impact of Proper Remediation

Homeowners often underestimate just how serious water damage can be. Hiring a professional service doesn’t just fix the problem—it lowers stress, saves money in the long run, and protects the safety and comfort of the family. Proper water remediation service can:

  • Prevent mold growth, which can cause respiratory issues, allergies, and structural decay.
  • Salvage household materials and possessions that might otherwise be lost.
  • Protect long-term property value by avoiding costly, lingering issues.
  • Provide peace of mind knowing the job is handled correctly the first time.

Why Bedrock Restoration of Edina Stands Out

When disaster strikes, homeowners need someone they trust. Bedrock Restoration of Edina brings professional care with human understanding, knowing that homes are more than just structures—they’re personal sanctuaries. With expertise in water remediation, the team uses advanced technology and proven methods to restore damaged homes quickly and thoroughly.

Whether dealing with a localized appliance leak or an entire home impacted by flooding, their trained experts know how to adapt solutions for every unique situation. For anyone facing sudden water damage, choosing an experienced partner in remediation will make all the difference in getting life back to normal.

Importance of Fast Action

The clock starts ticking the moment water enters a property. Every hour that passes means the potential for more damage. Carpets quickly soak through, wood begins to warp, and drywall starts to weaken. Within two days, mold can appear. That’s why immediate professional water remediation service is so important. Acting fast doesn’t just reduce repair costs; it also minimizes permanent losses.

Remediation experts understand that emergencies don’t wait, which is why services are available around the clock. With fast action and the right tools, homes are not just dried—they’re restored.

Long-Term Peace of Mind

Beyond cleanup, true resilience comes from knowing your home is safe. A trusted water remediation expert ensures no hidden issues are left untreated, giving homeowners a genuine sense of security. Restoring a home is about more than materials—it’s about restoring comfort, confidence, and peace of mind.


Bedrock Restoration of Edina

Edina, MN, United States

(612) 230-9207

https://bedrockrestoration.com/water-damage-restoration-edina-mn/